After I've imported my footage, I open up Adobe Bridge. That's right.. NOT Lightroom. Most photographers open up Lightroom to tune their images before they "go in" or begin major editing.
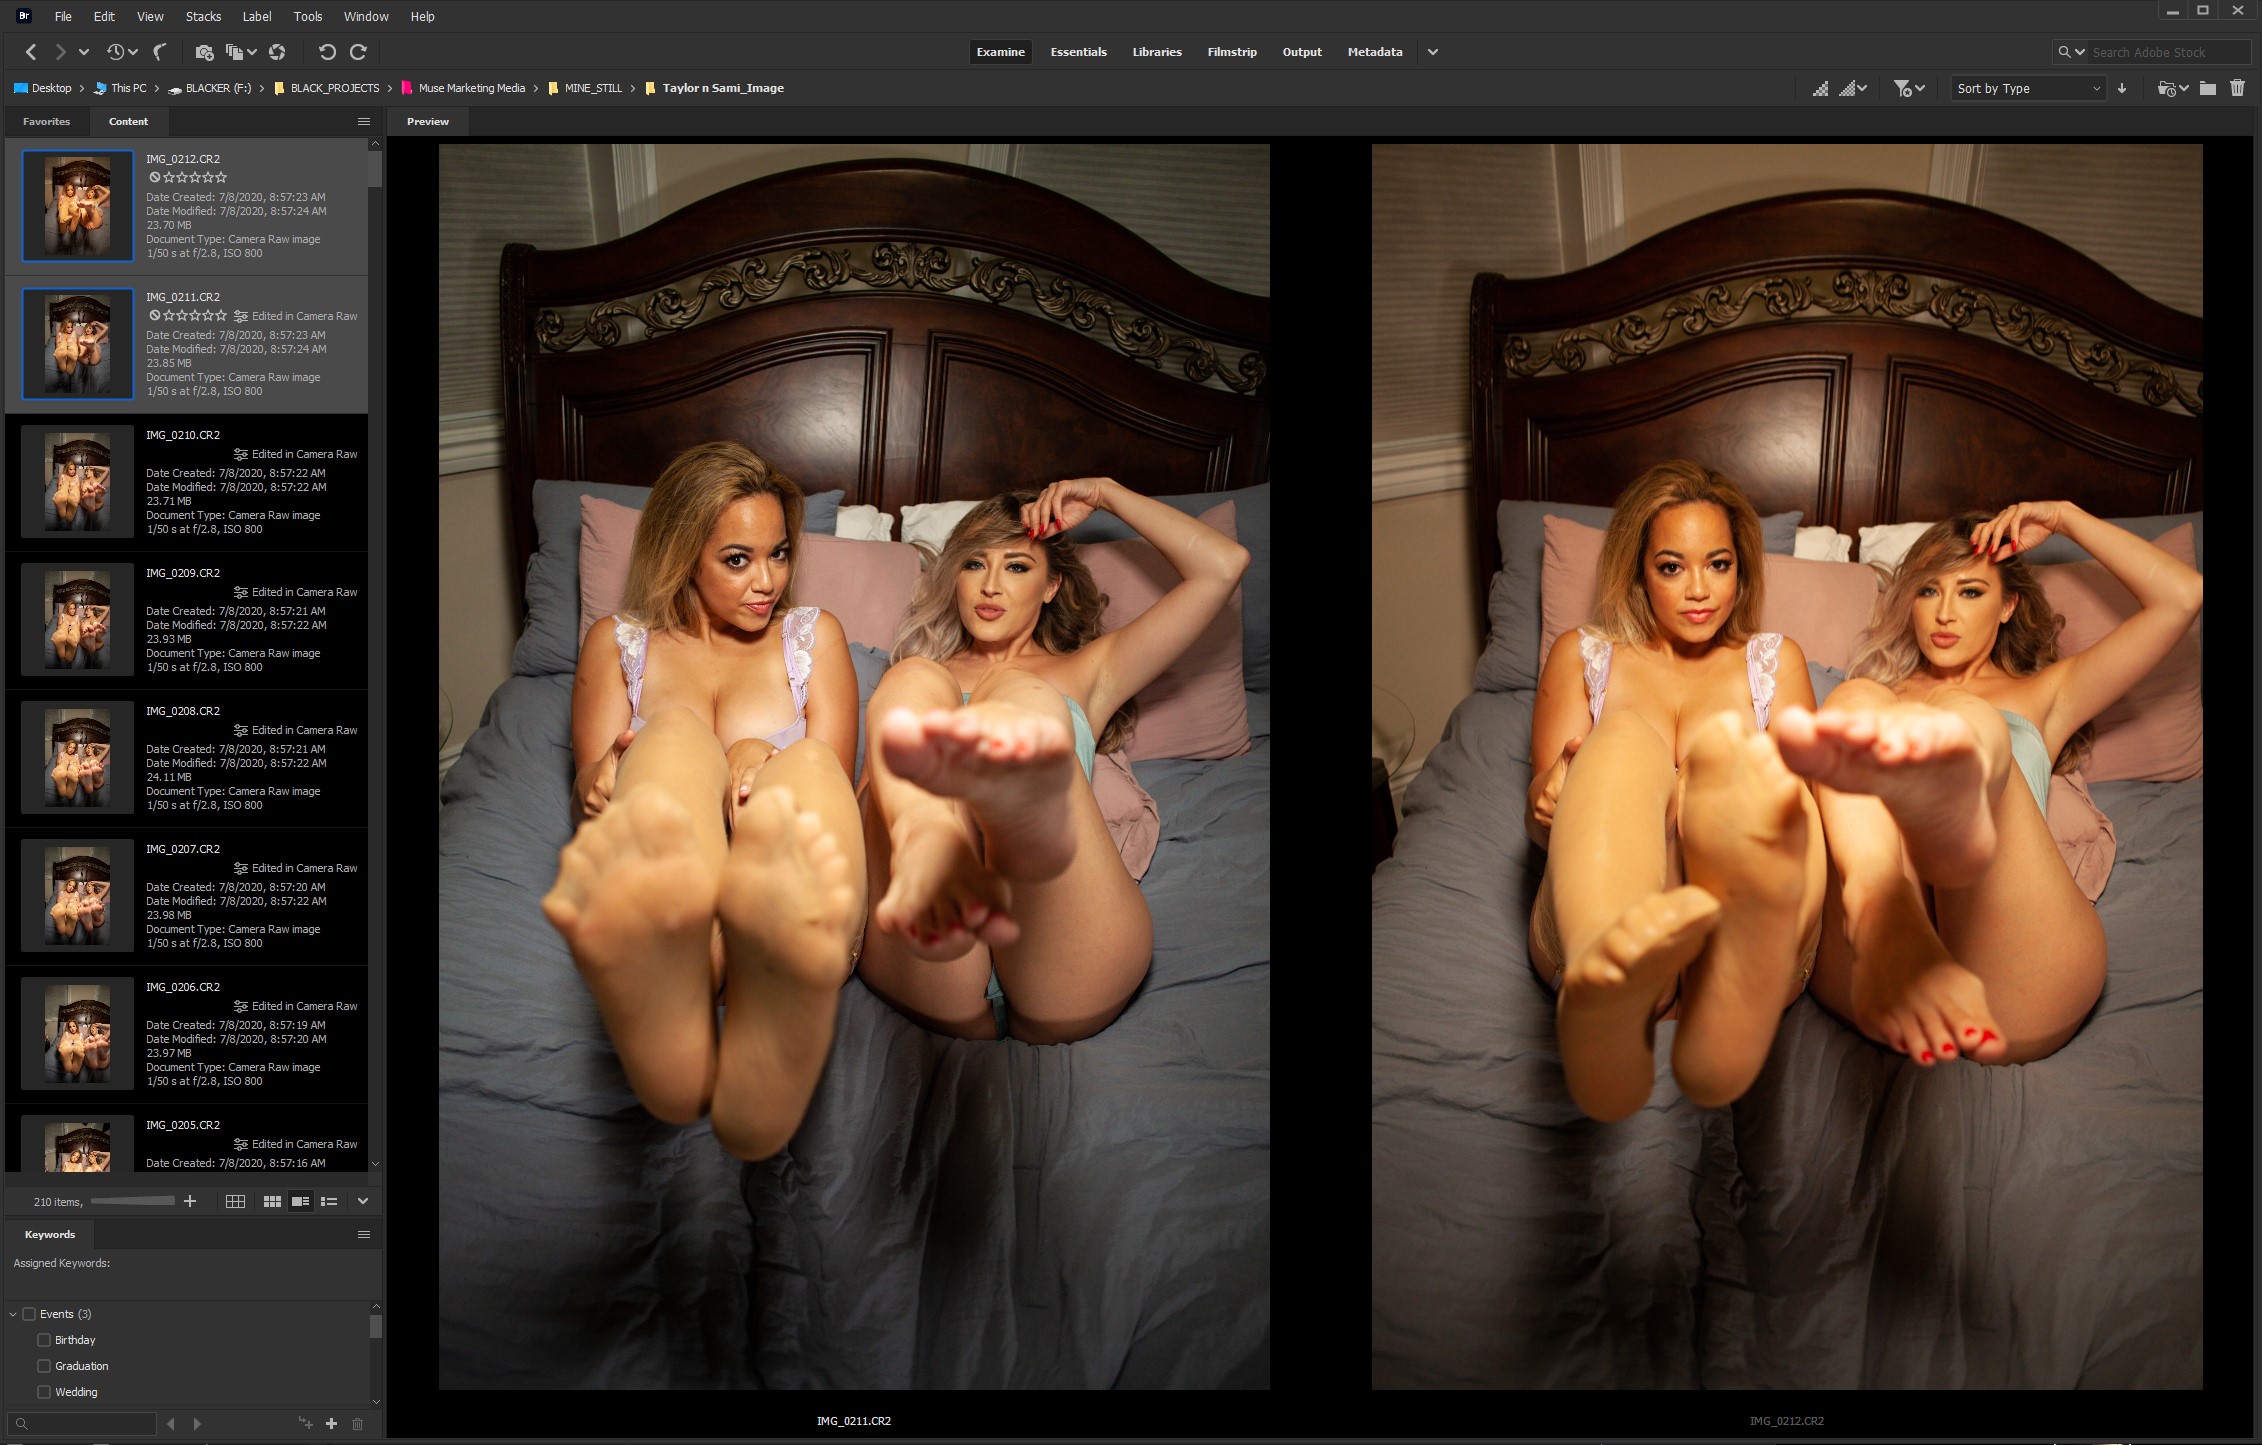
Bridge has proven it's self to be the better option for file management for me. Lightroom is easy witch is the problem for me. It's too easy to where there are less options. Bridge gives me everything I need from diferent workspaces, Camera Raw editing, star ratings, tags with keywords a magnifying glass feature to check the sharpness and file paths. Lightroom classic is grate too but I don't want to add an other hefty piece of software on to my heard drive. I just need to be able to change RAW settings to a large number of photos while also logging them in.
Checking quality
Once I have selected an image, I use the magnifying glass feature to make sure that the the picture is not only sharp but tac-sharp. It's always good to find what you're working with and see what elements you'd wanna keep to retain natural texture and clarity. Once I like that I see, I rate it.
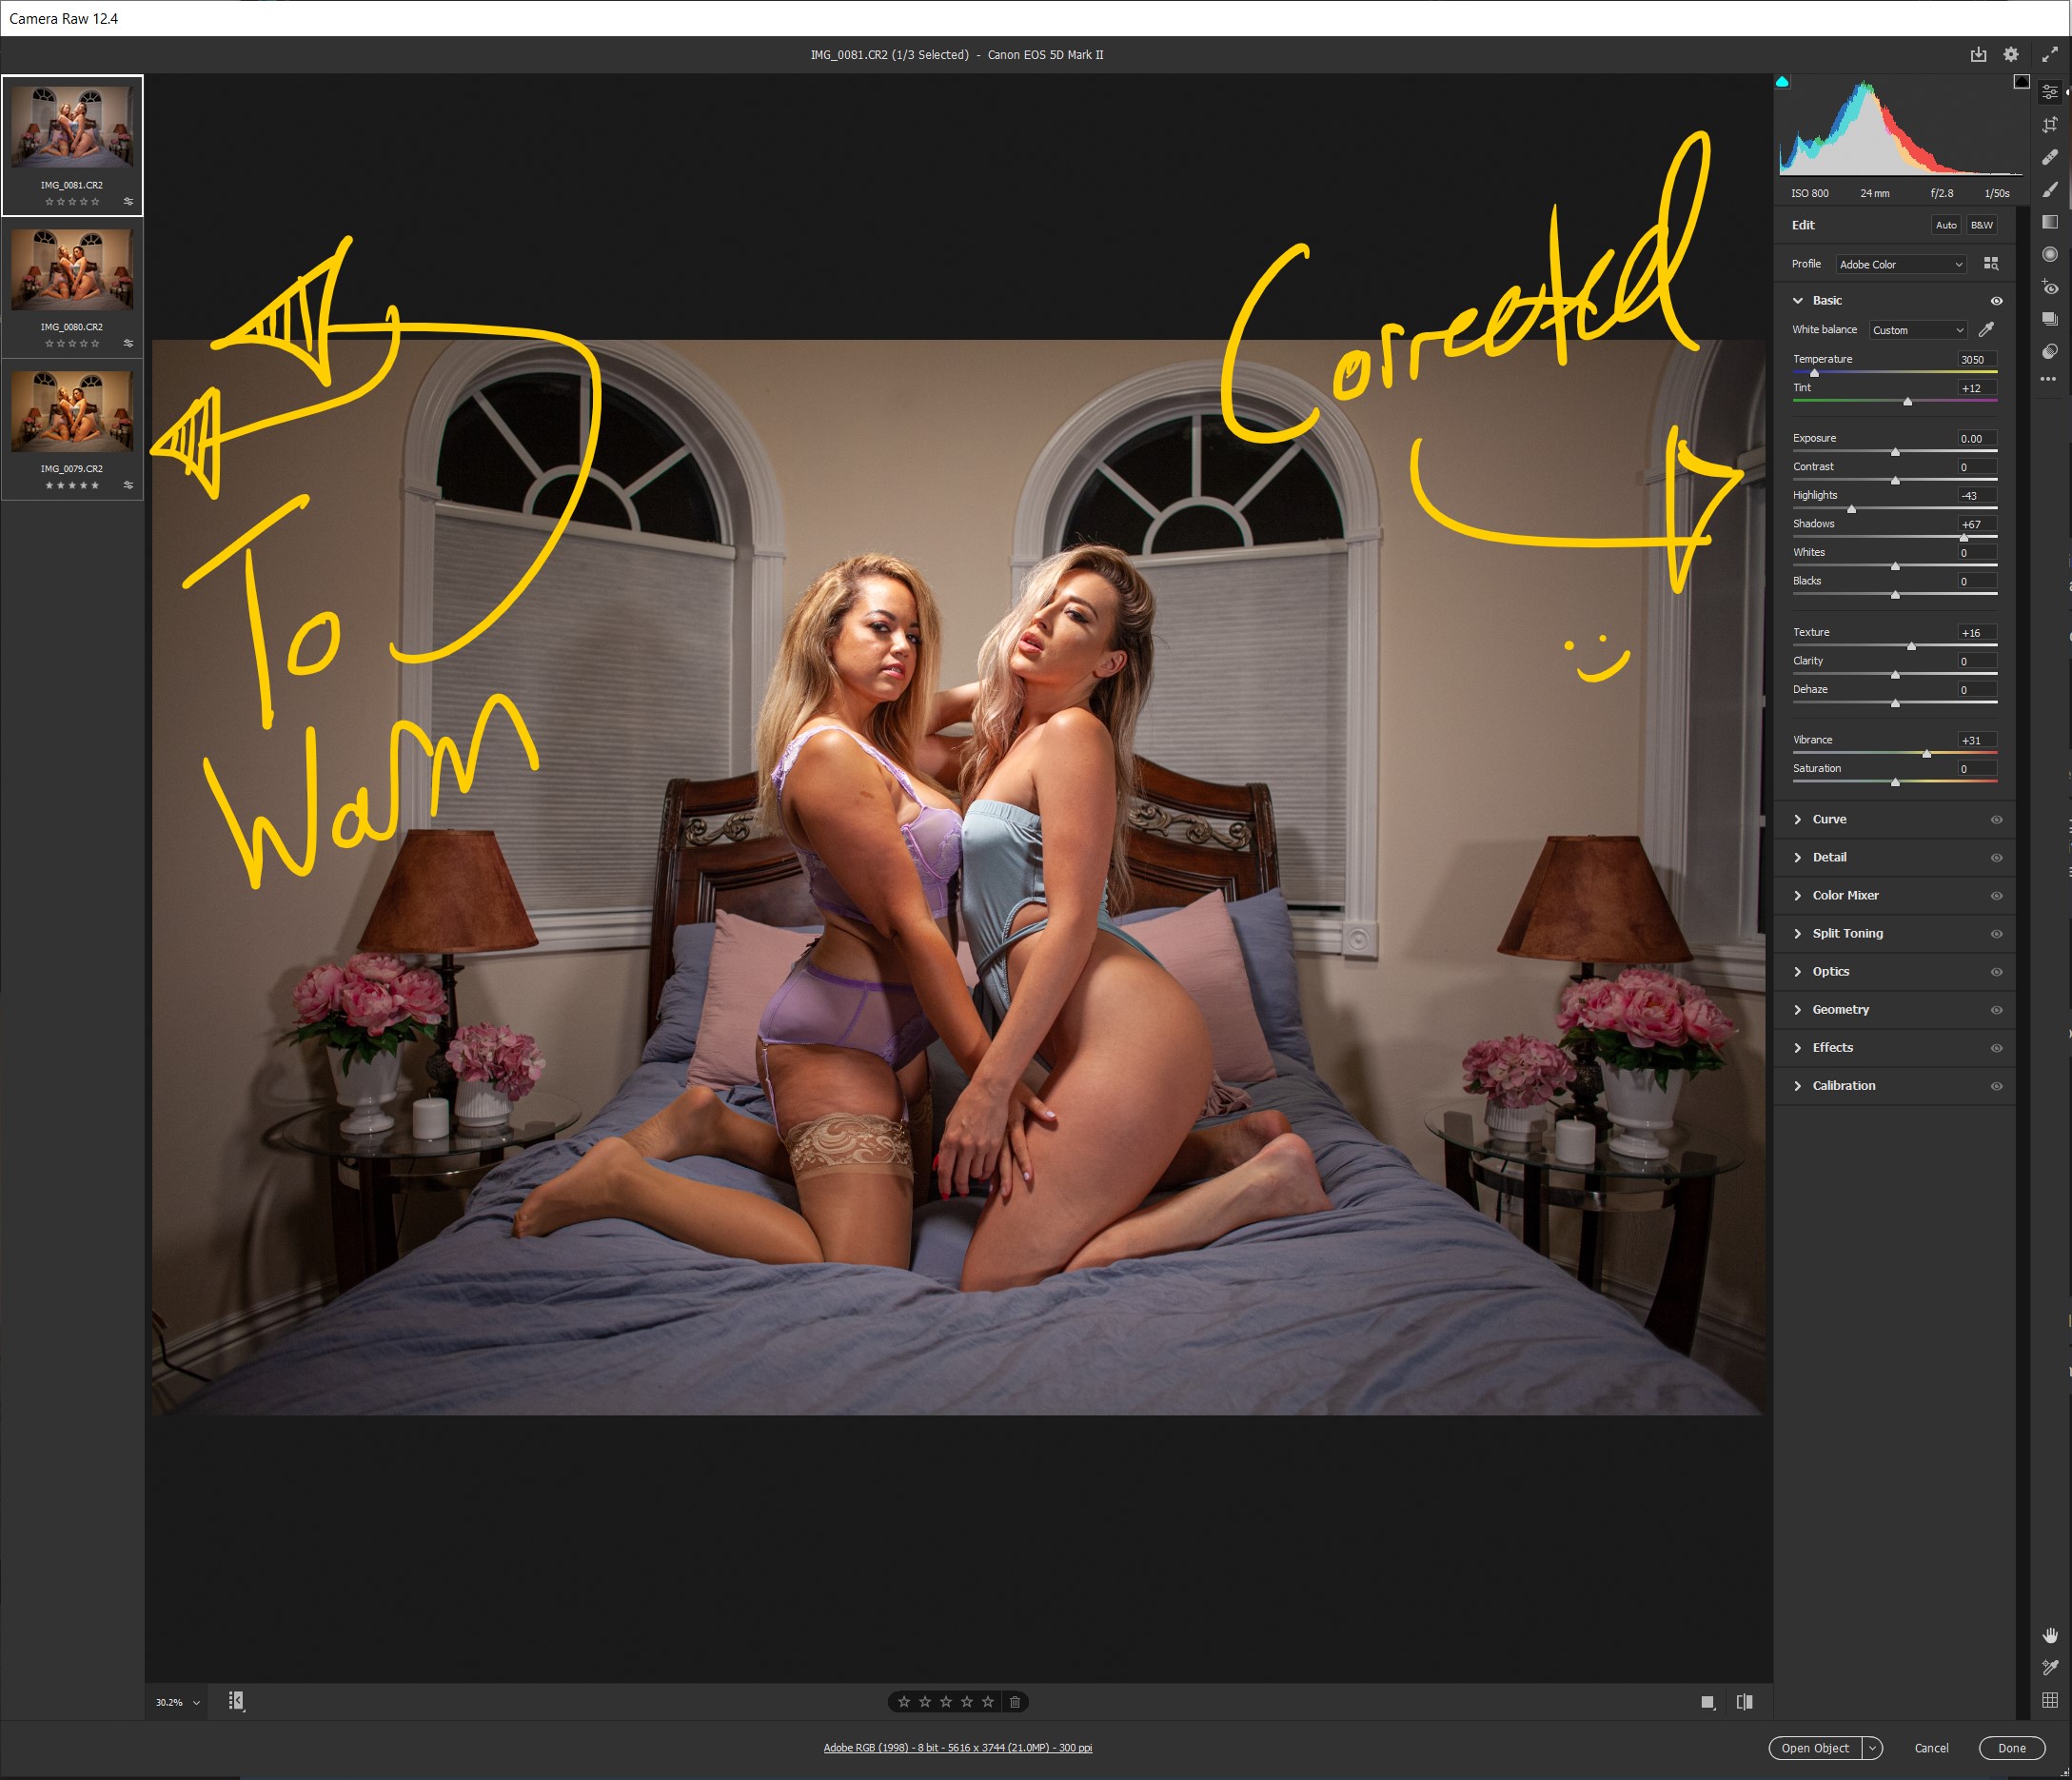
If there are any imperfections relating to the settings like being too warm or cool, I open up Camera Raw and correct color, sharpness, light and shadow.
Cleaning up the photo
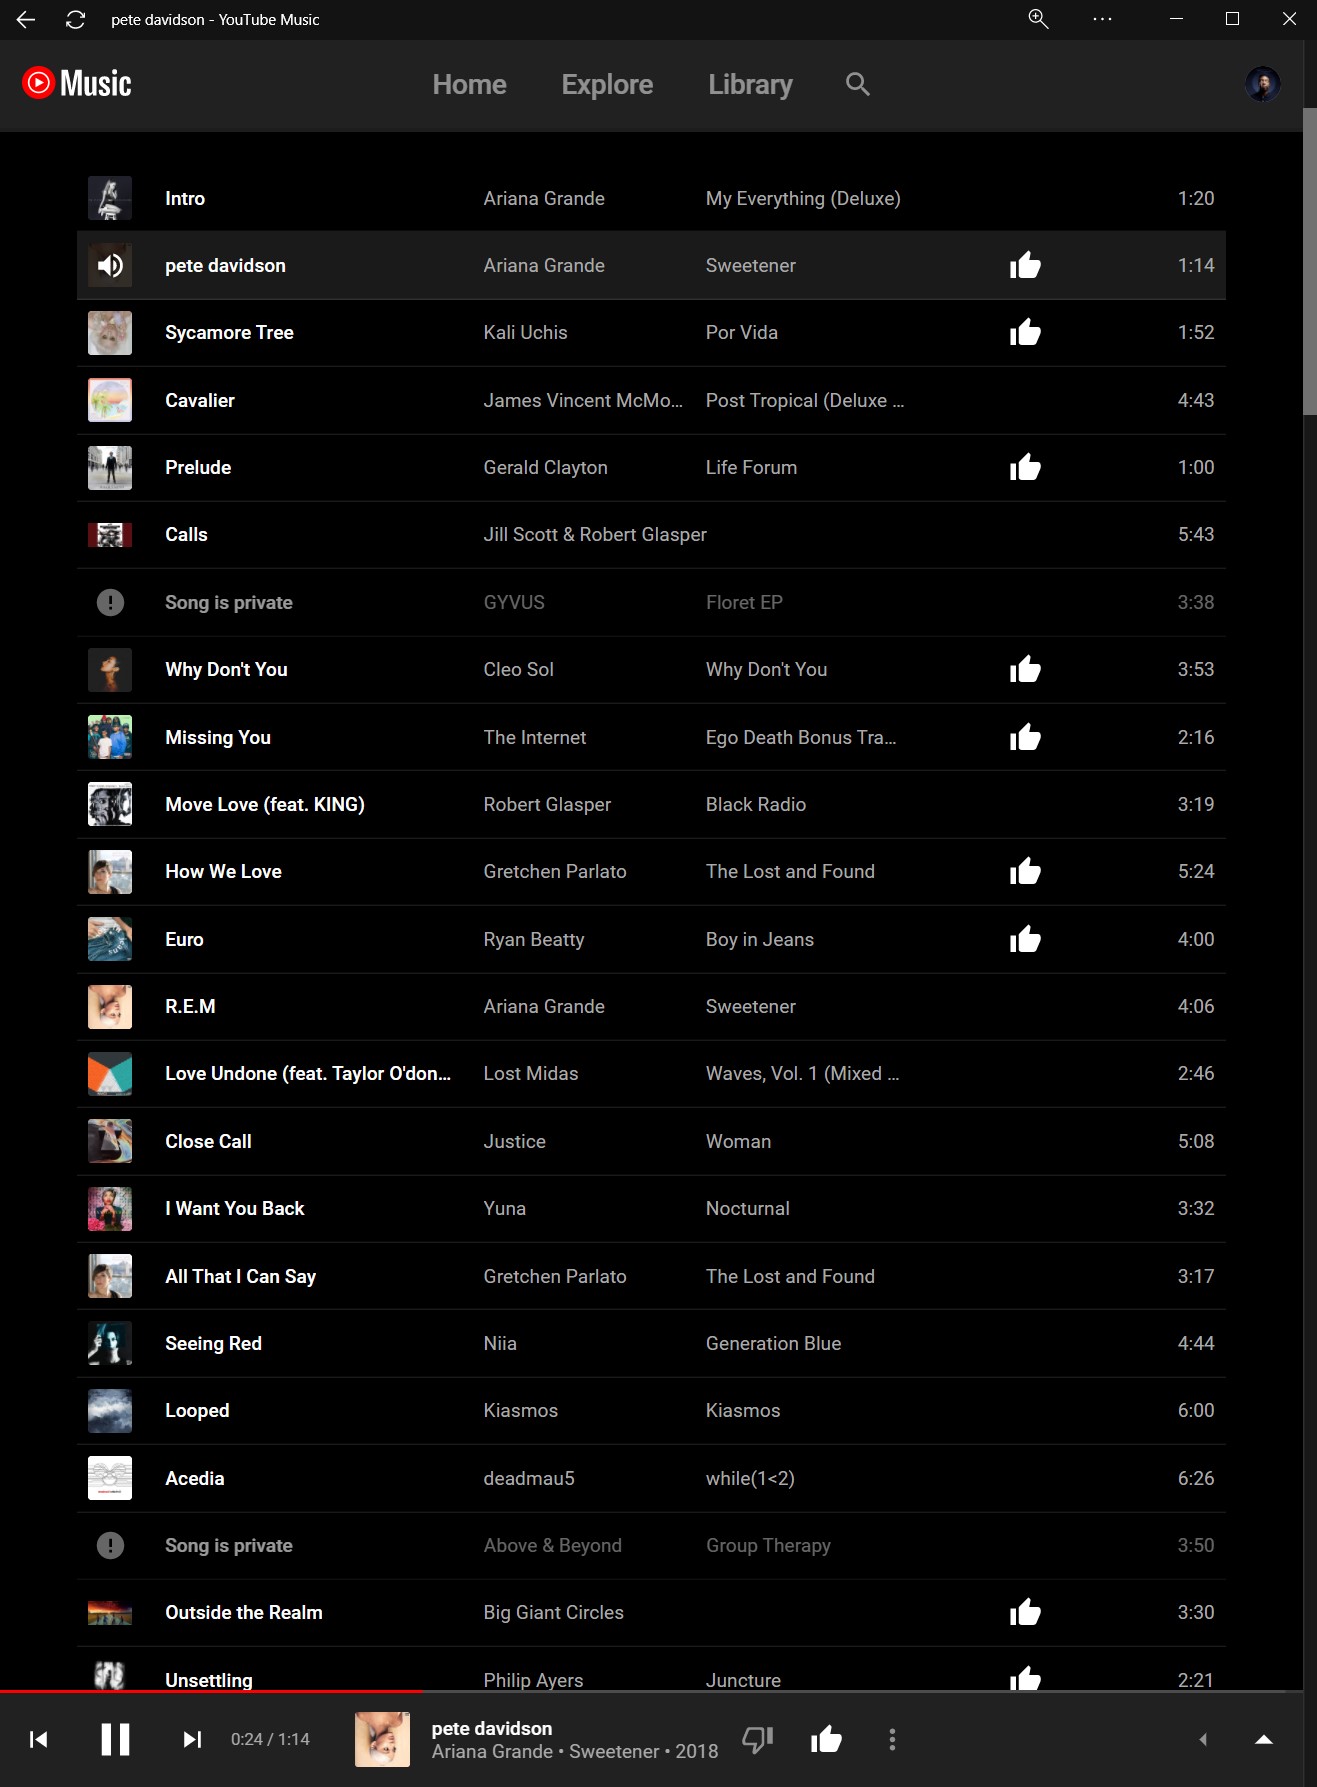
Like every cleaning you'd do in your home, I play music. If you'd like to know what I was listening to while editing this photo, click here. It's a hand picked playlist of music I listen to when editing photos. I call it DAYDREAMERS.
Removing imperfections
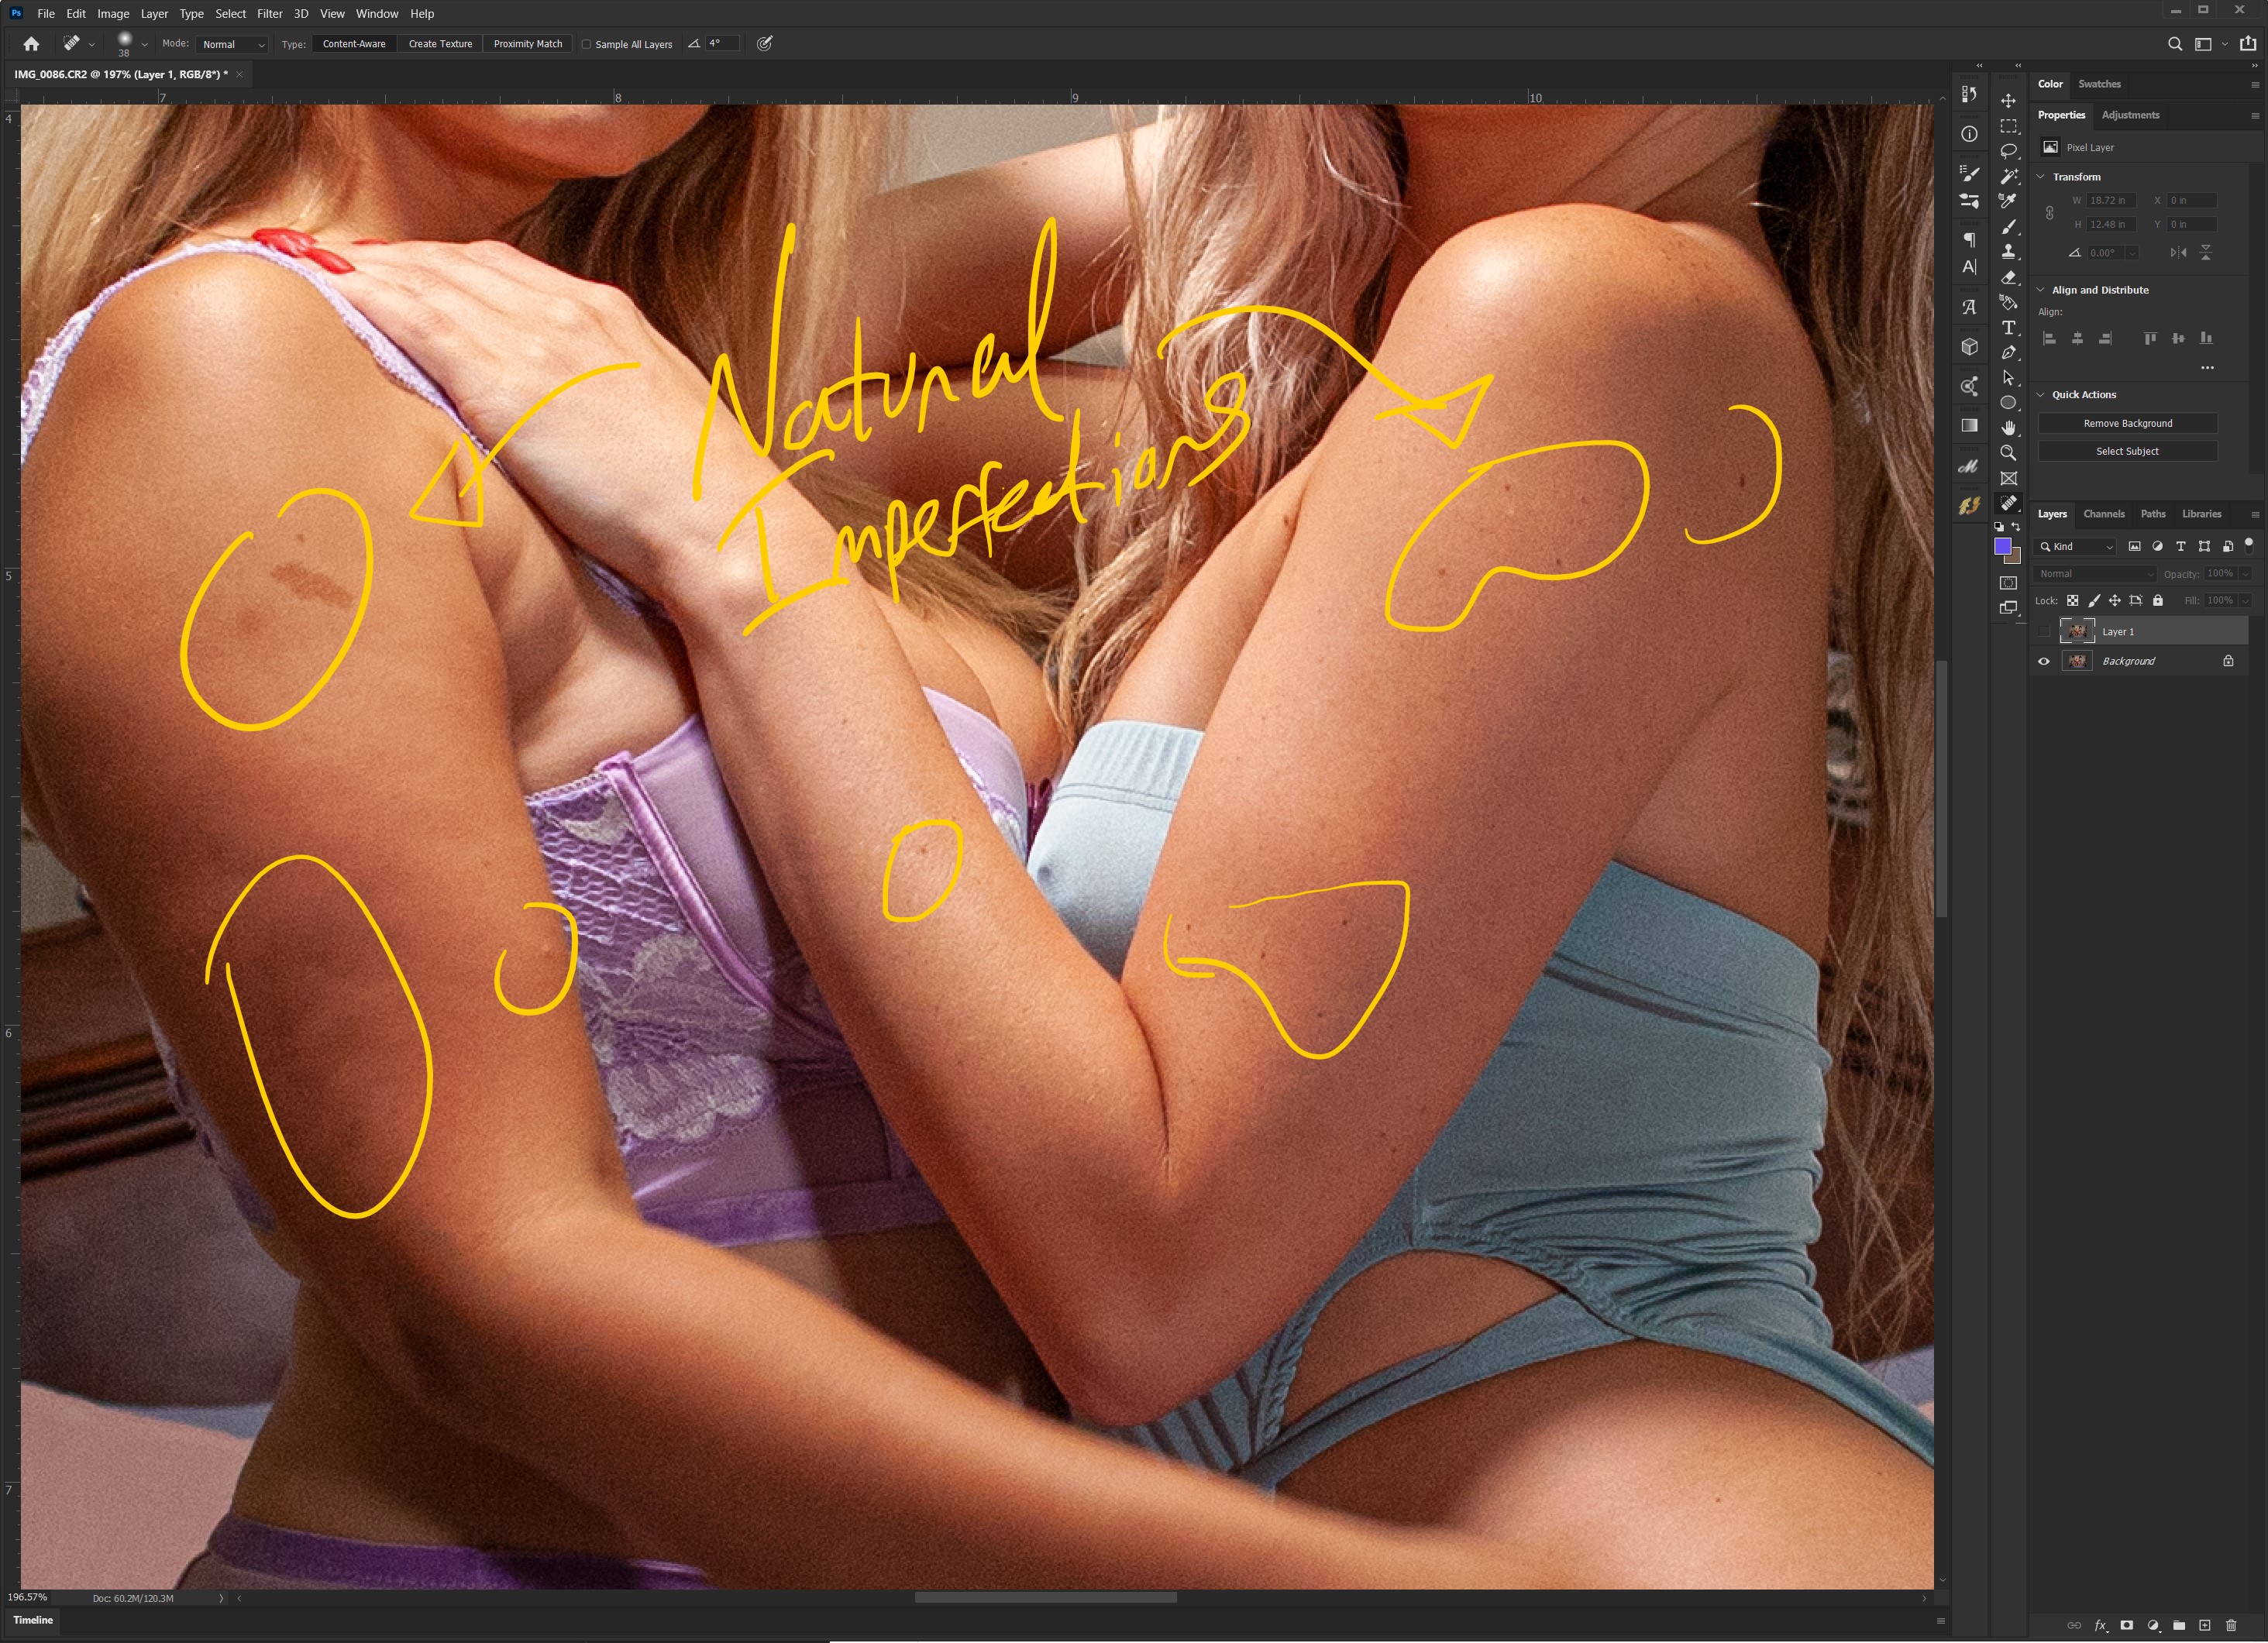
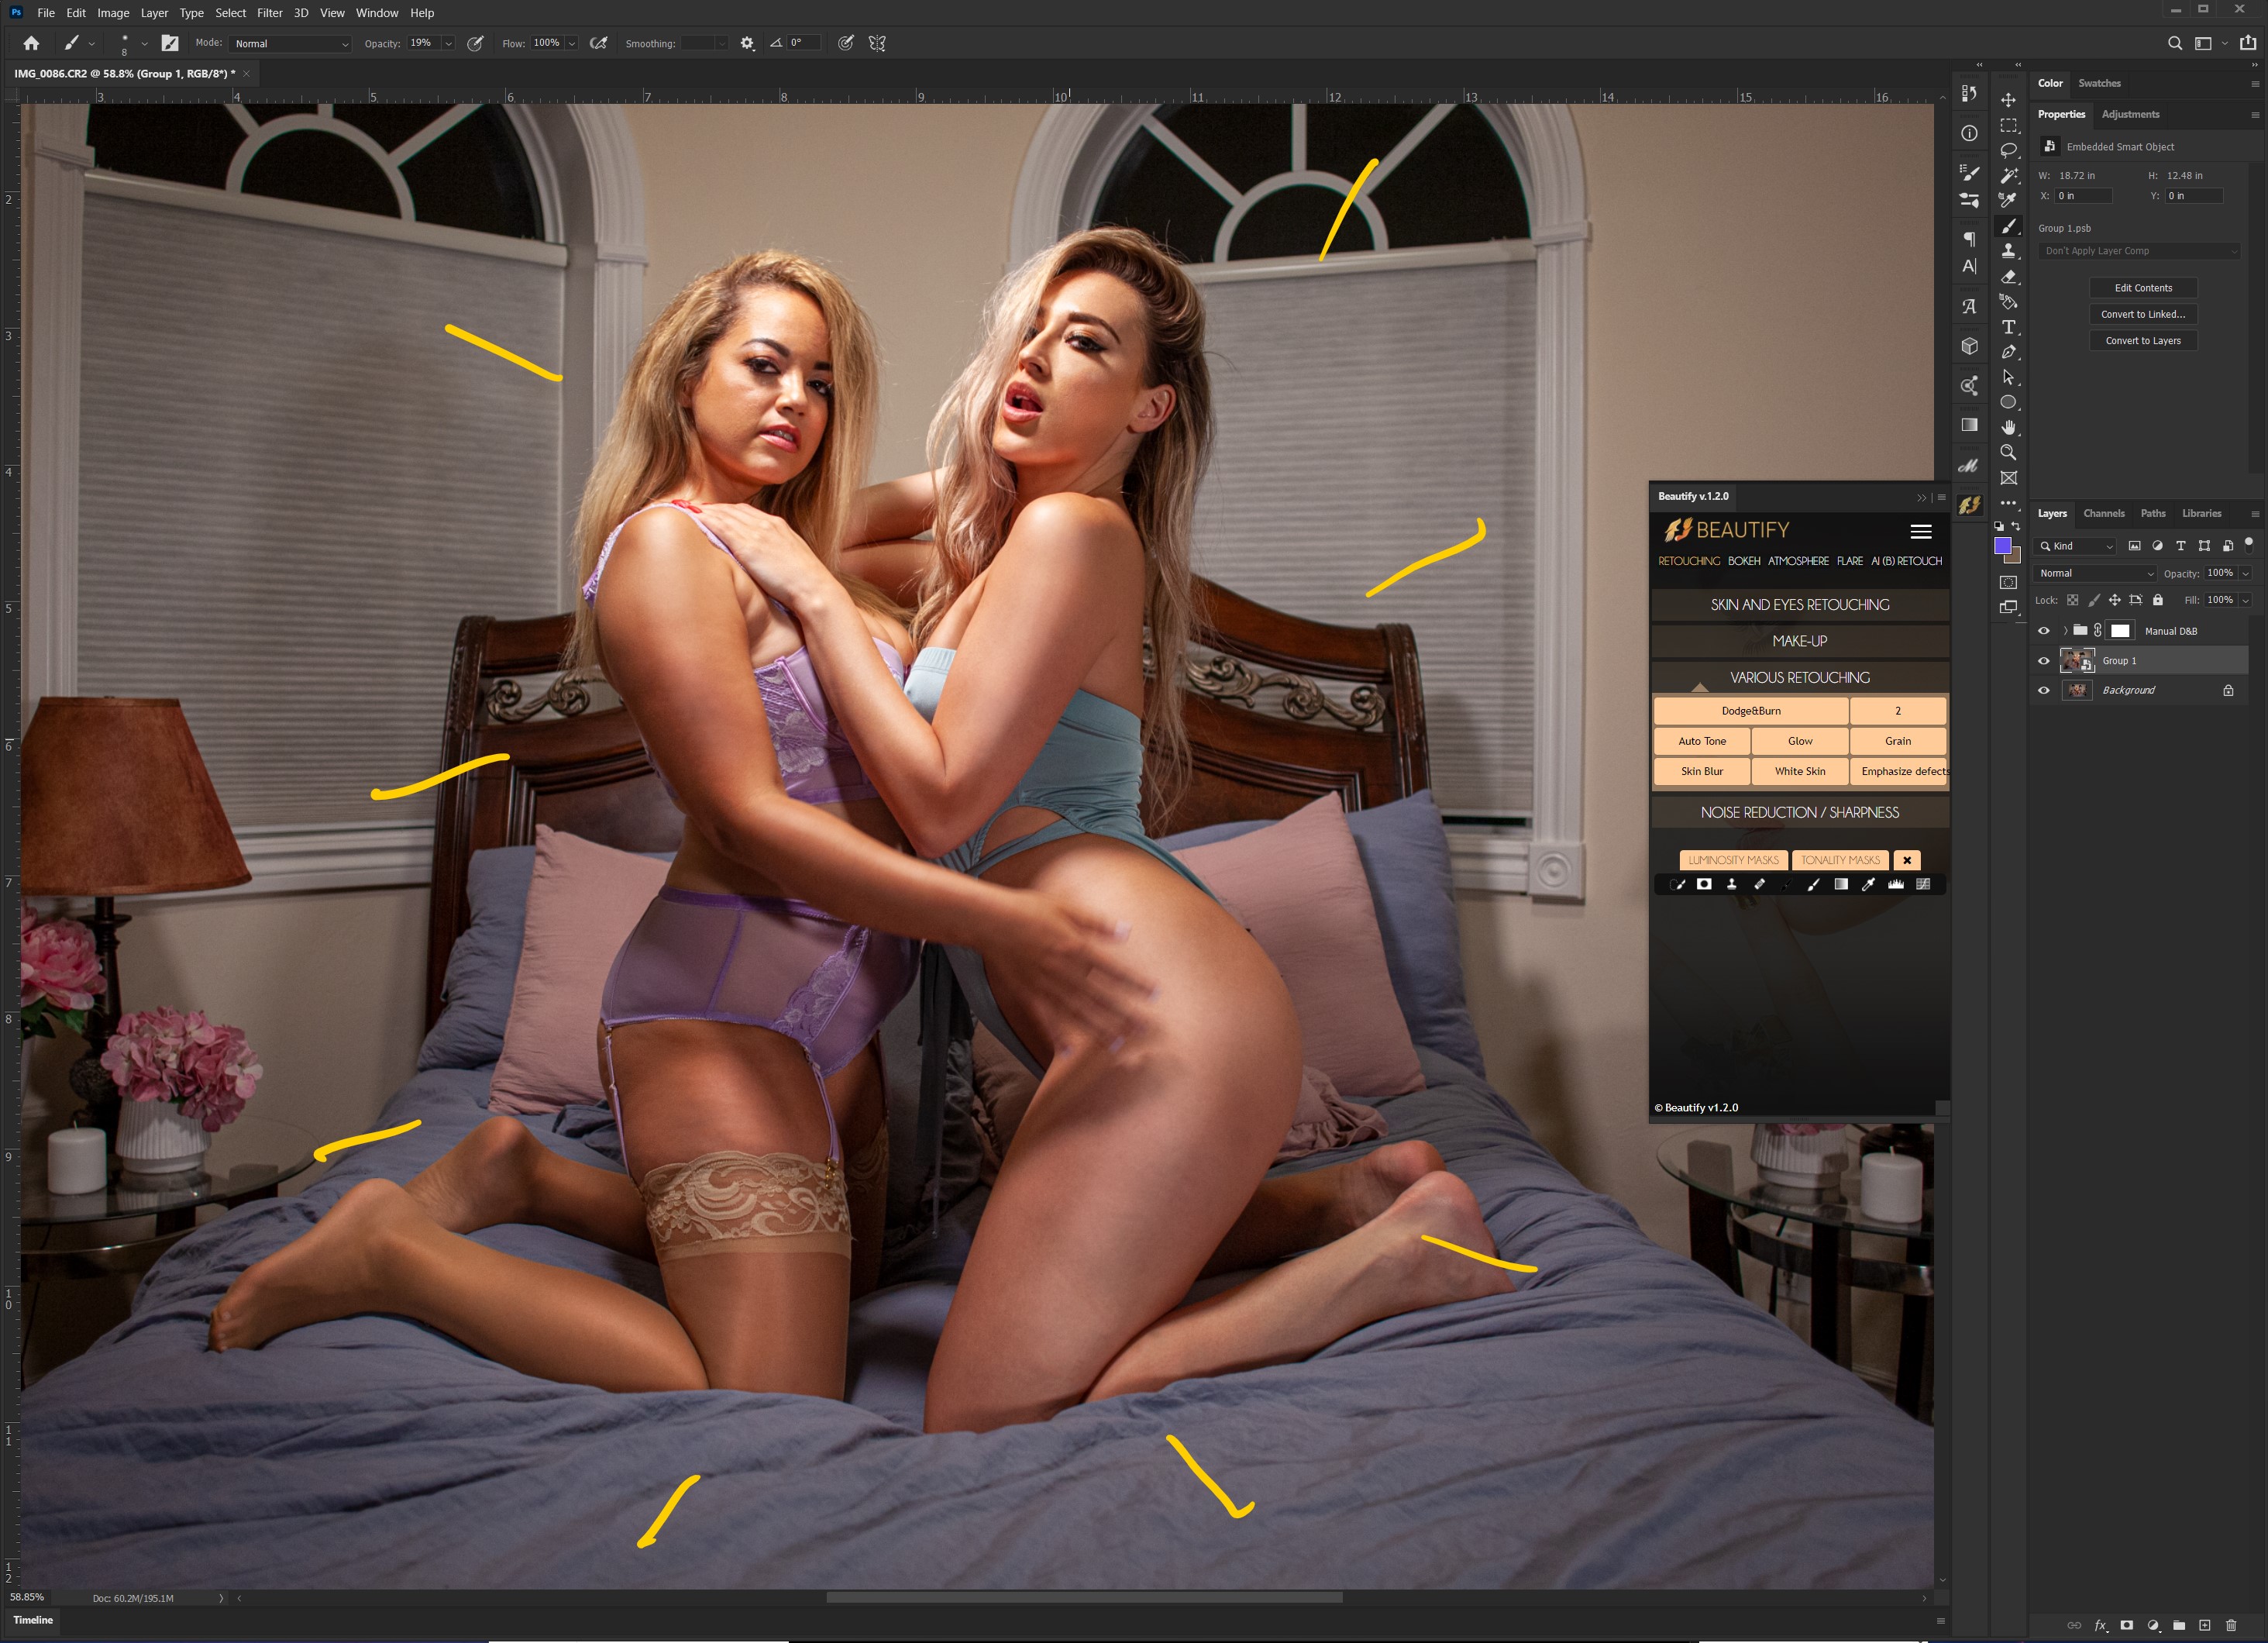
Use the spot-healing tool or the patch tool to remove any spots or scars. You wanna do this to the entire body. Leave no place unchecked. This includes hair, clothing, props and scenery
objects like a window, lamp or bed sheets.

BEAUTIFY TOOL

I use "Beautify". I promise I'm not sponsored by Beautify, but I use this extension for making my photoshop experience faster. Beautify is a set of actions that are designed to by nondestructive. Beautify came out with a second version and I'll get that one soon.
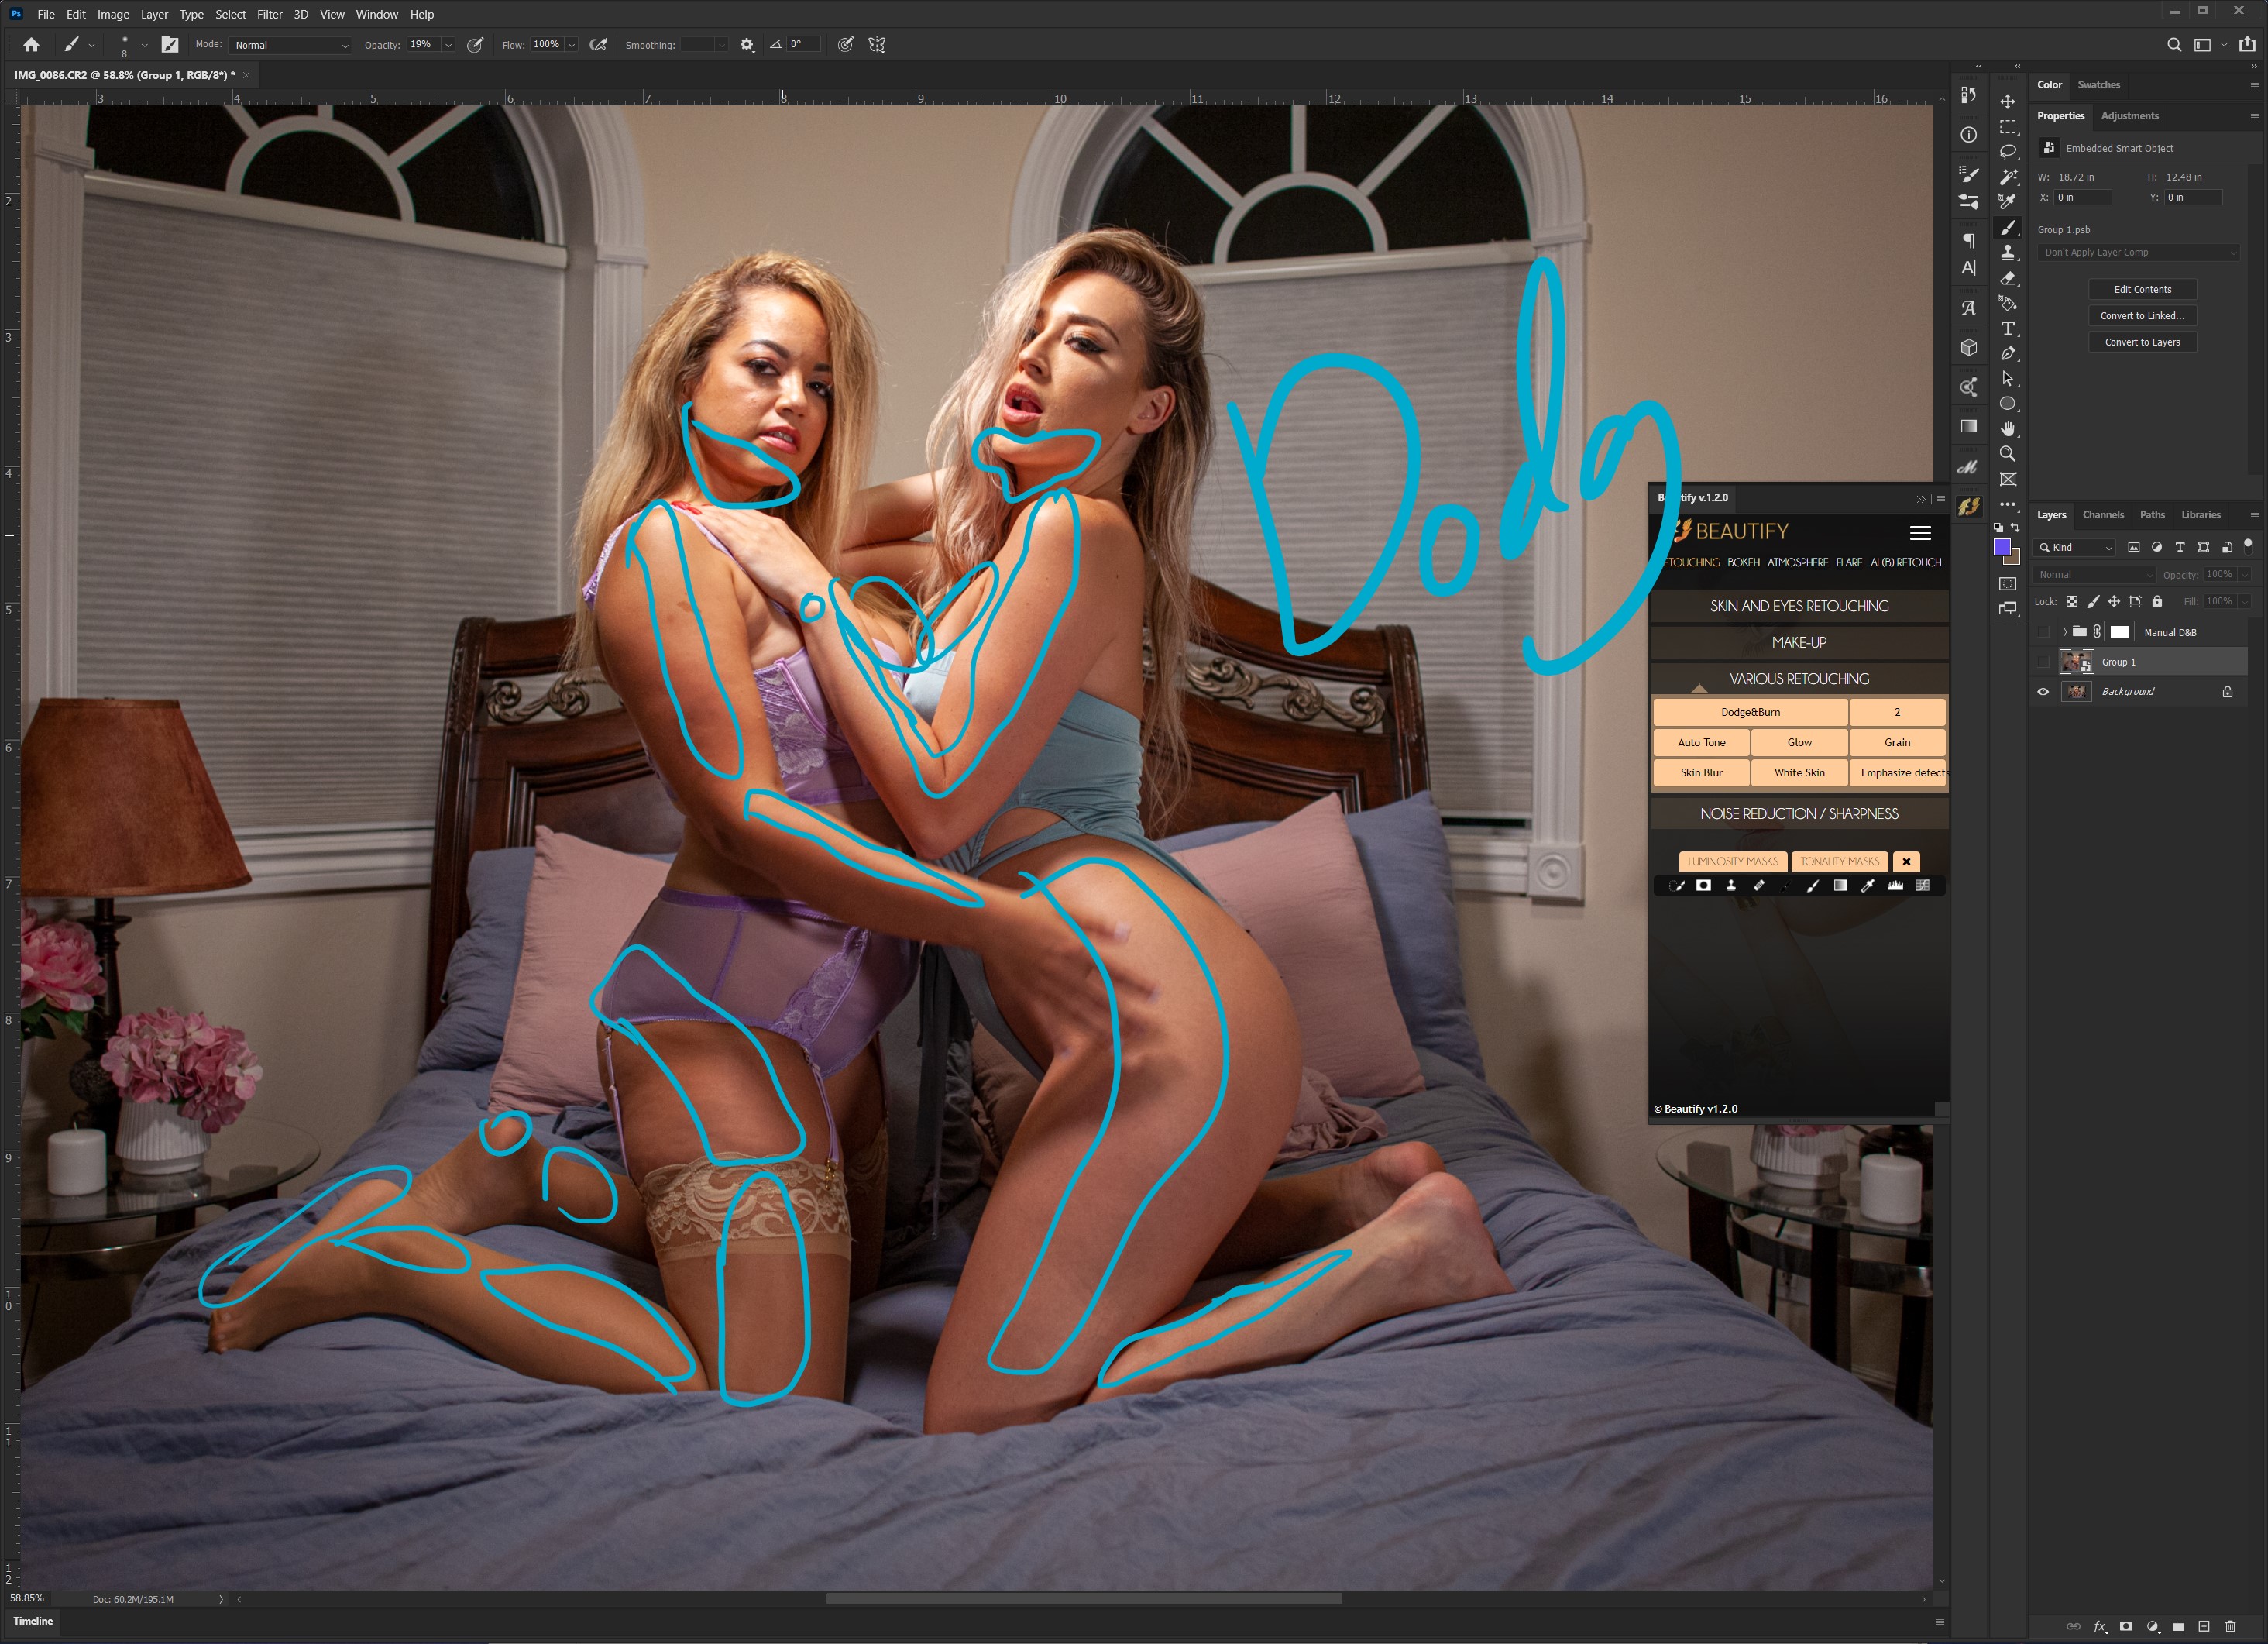
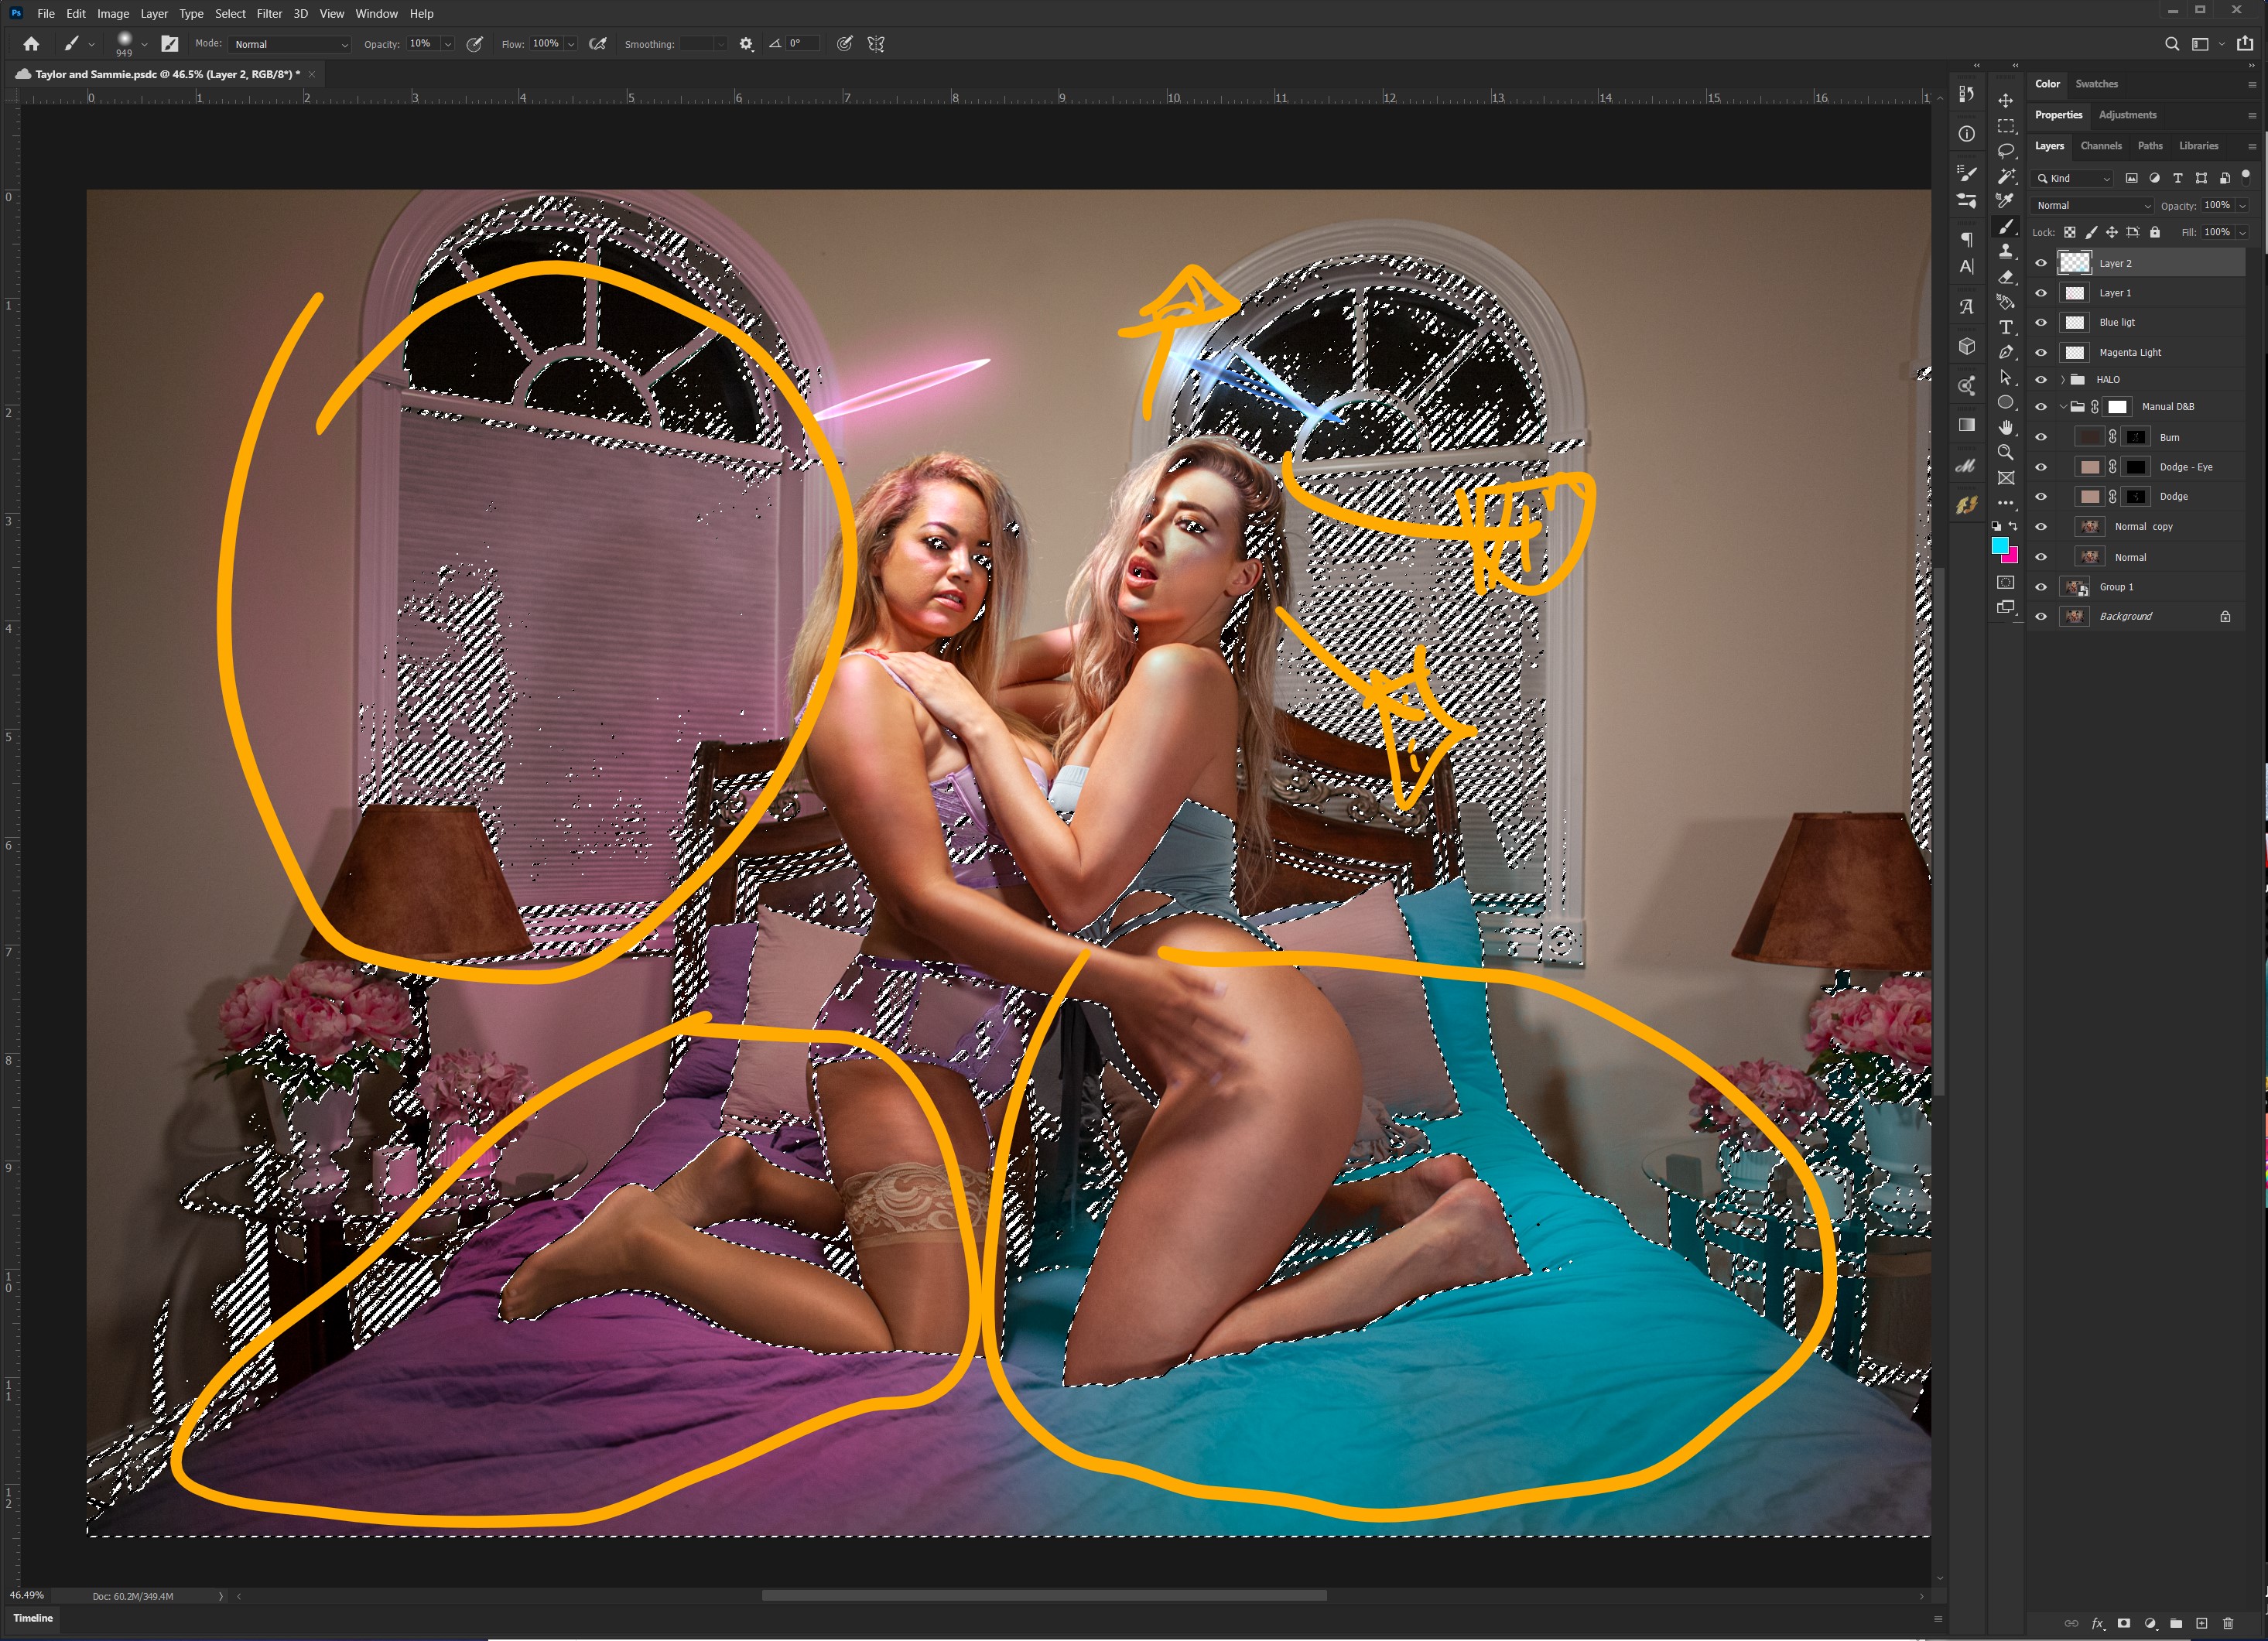
This is after simple spot healing. I next open my Beautify panel and click the "frequency separation" tab. I've been doing frequency separation for a wile and it's grate but Beautify makes it easy to use one bouton to set it up for you as apposed to manually like I use to do it. I use a combination of thees tools and manual setups to retouch my images. After Frequency separation, start the Doge and Burn process. To me, this is the part that makes things juicy.
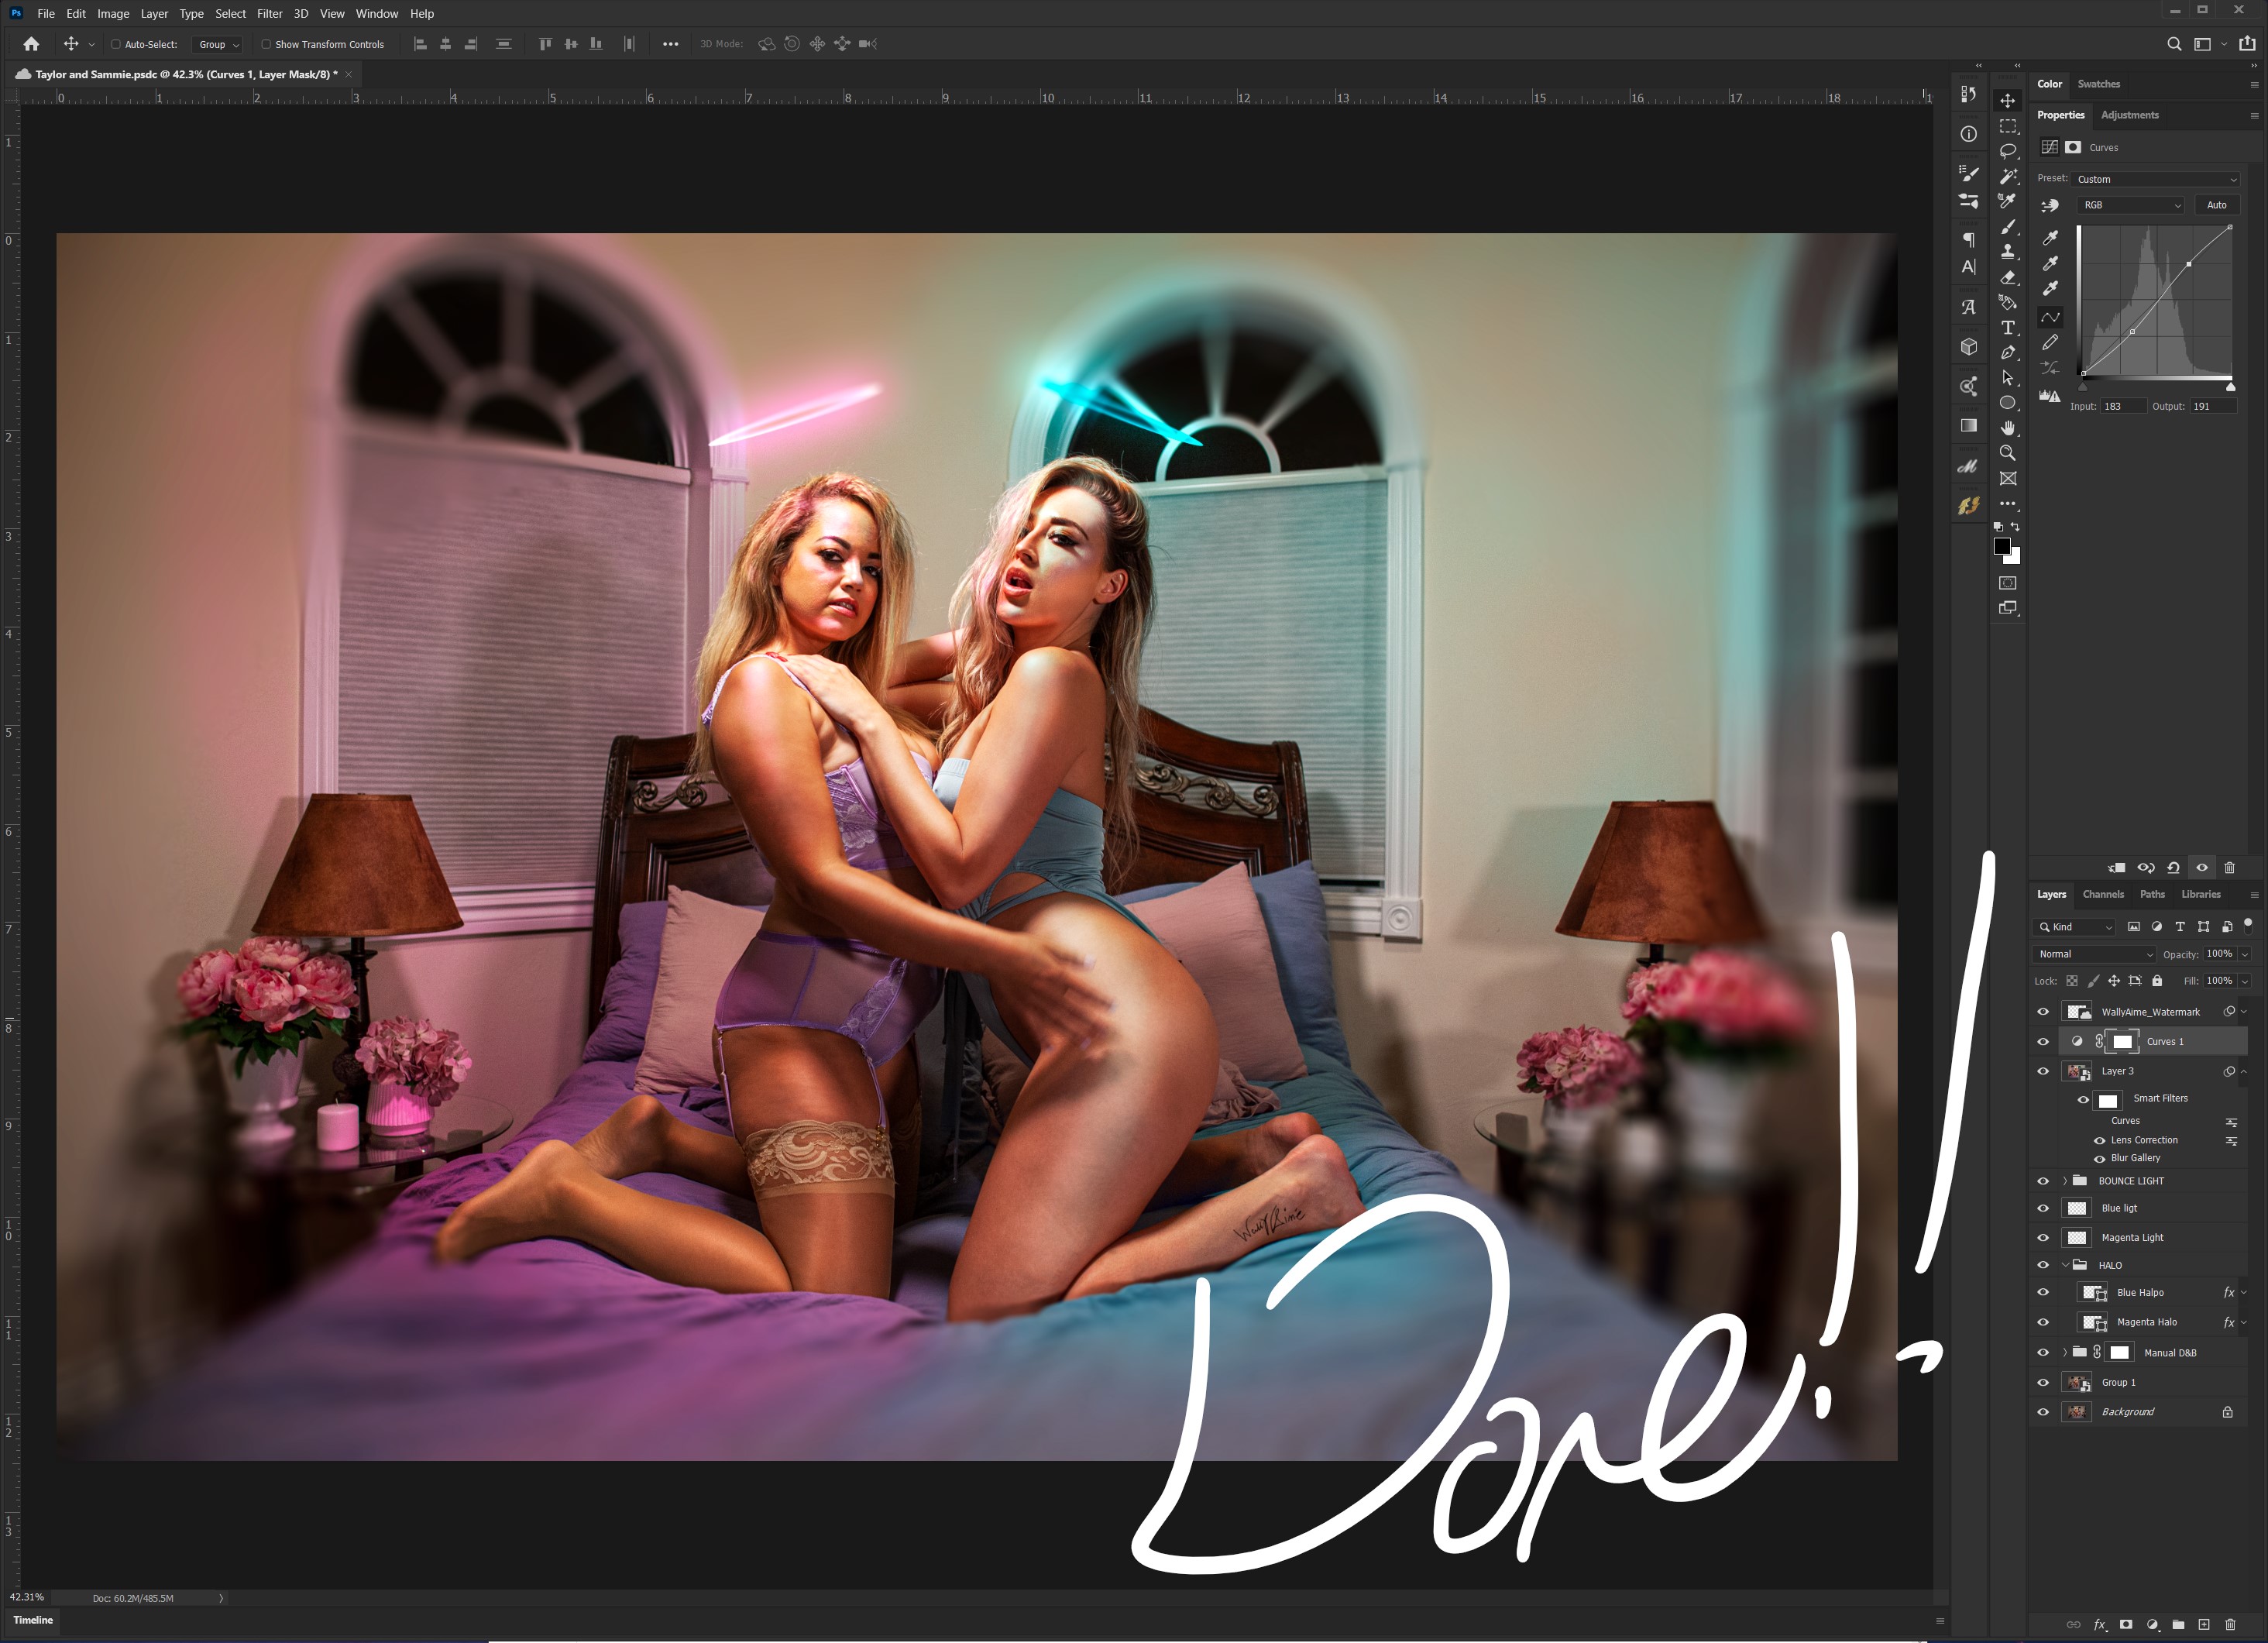
The circled areas are where I've applied more exposure. I do this to pronounce the existing light bouncing off the models. I set my brush to a super low 8%. This feature is sensitive but the control it comes with is grate.
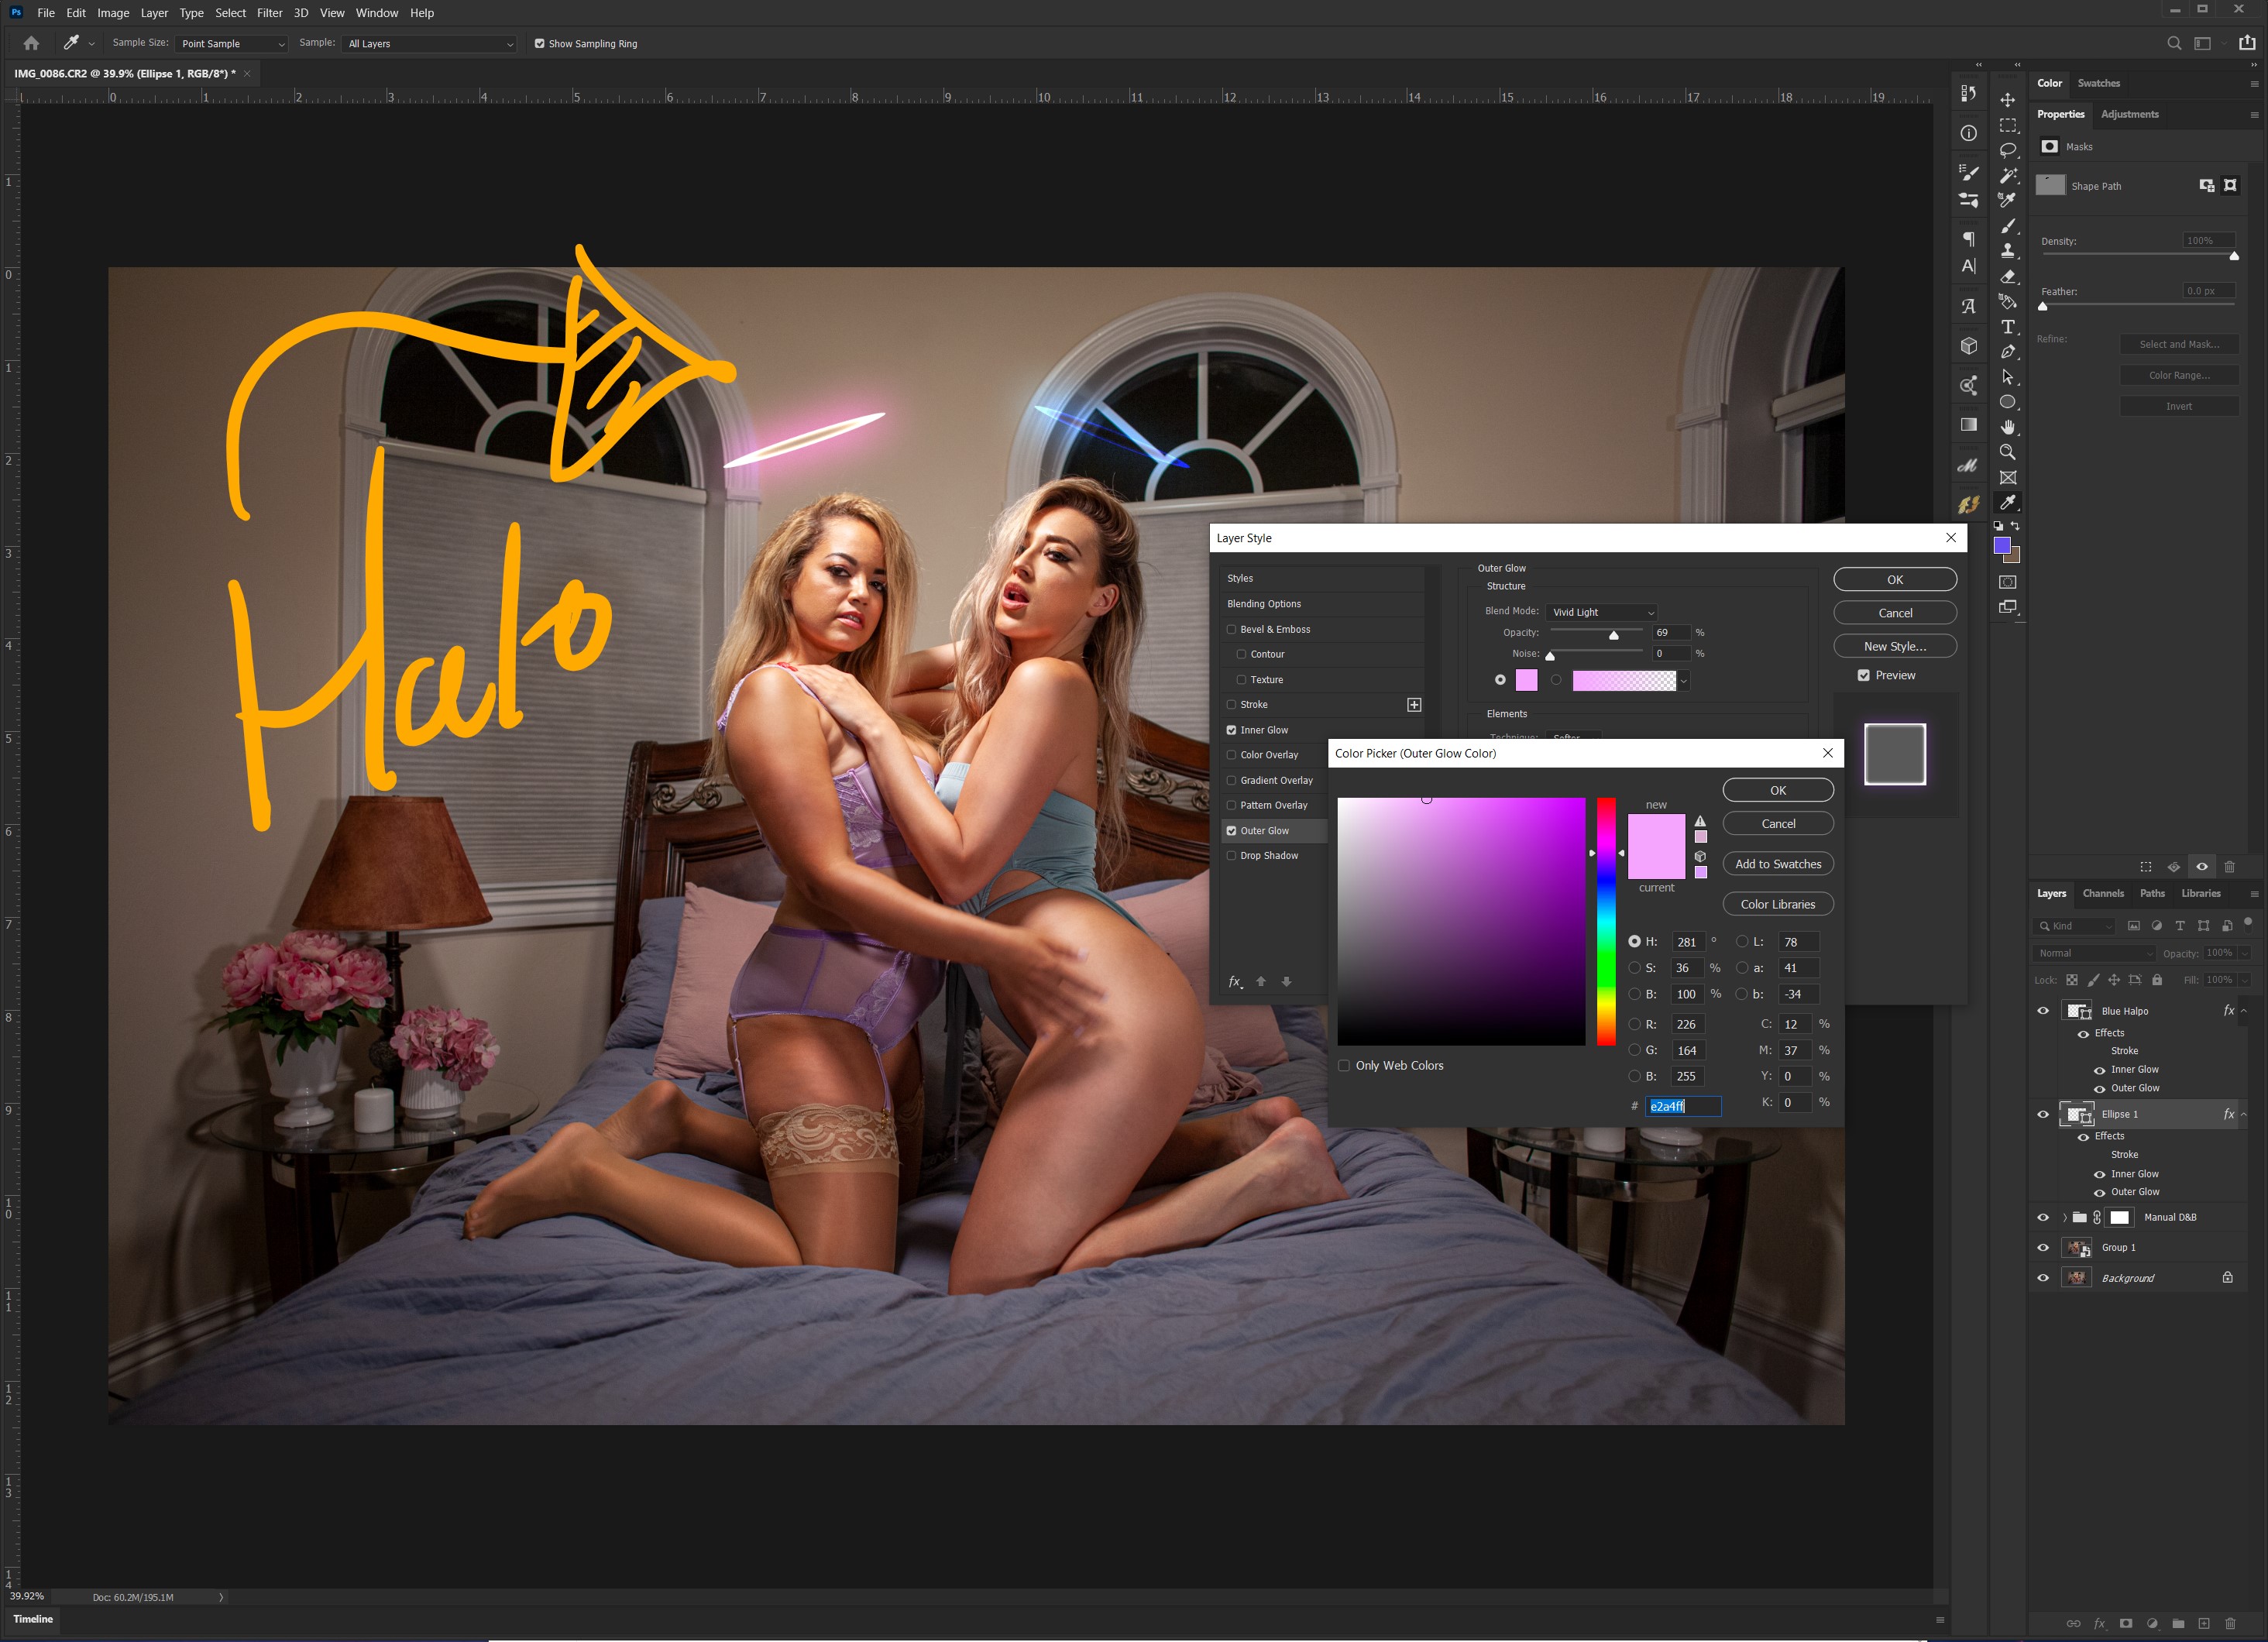
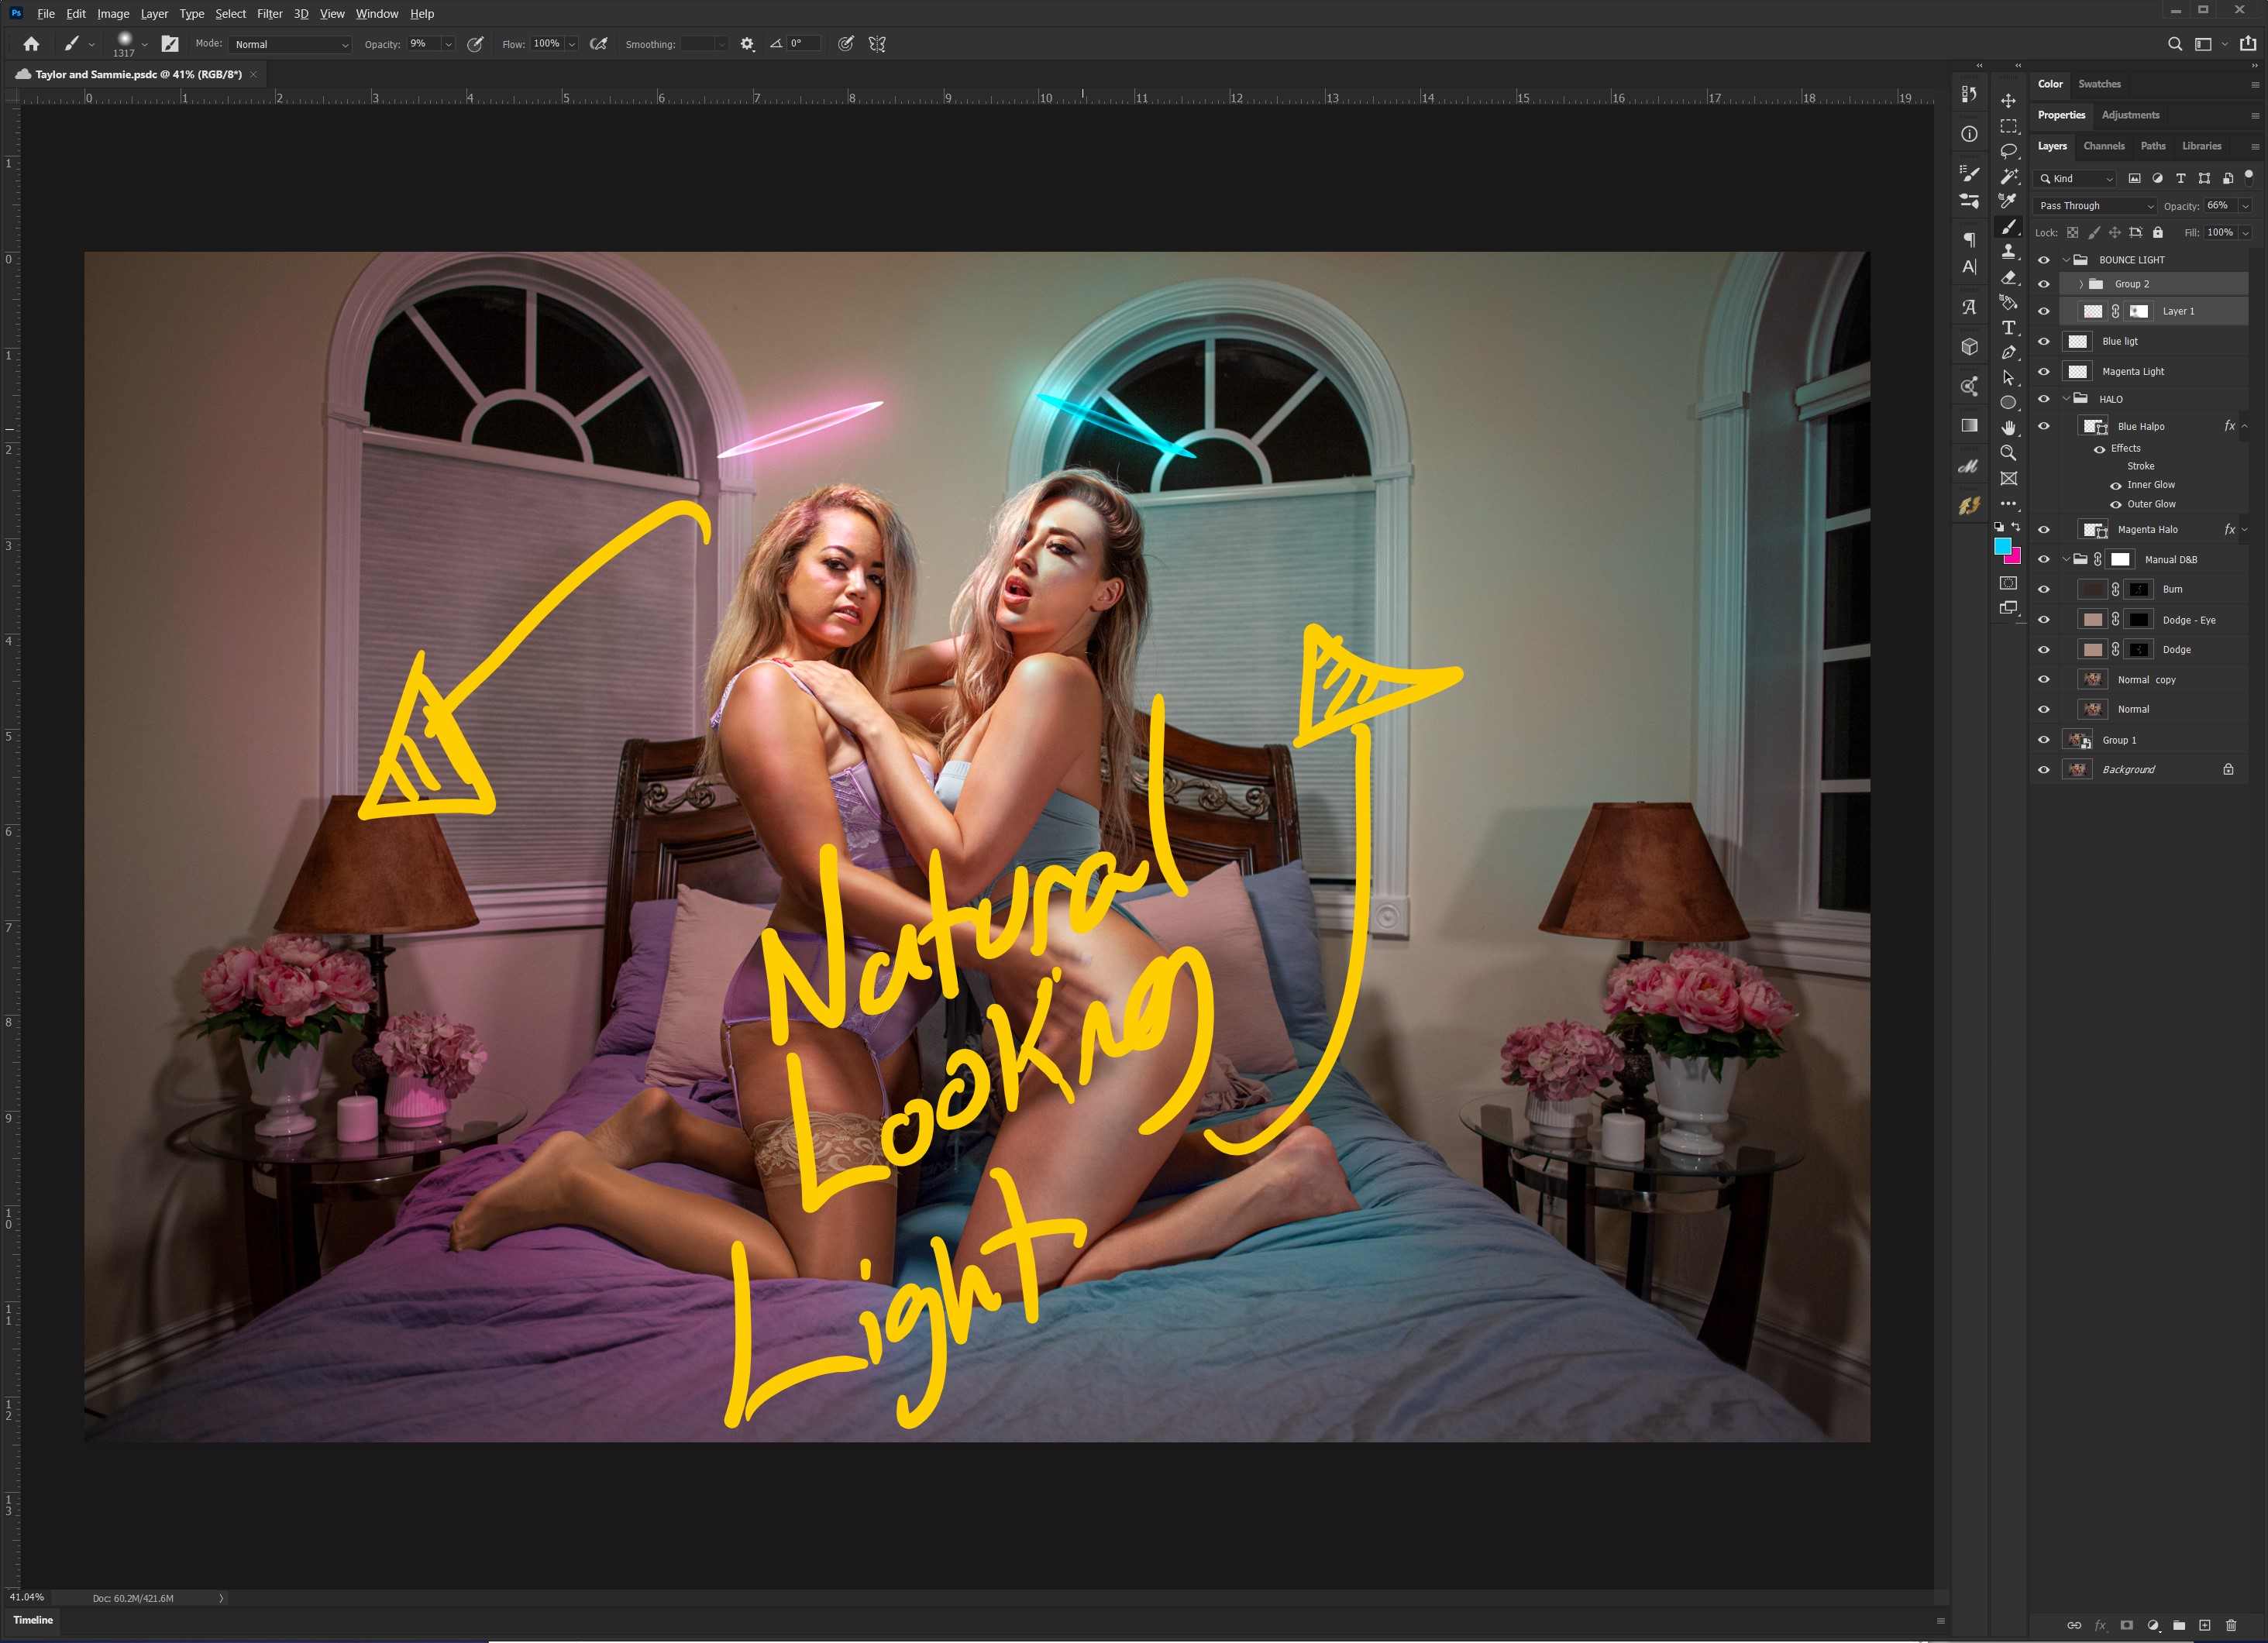
Now that I've cleaned the image, I begin my creative thinking. To me, thees women look like angels. With the ellipse tool, I made a narrow oval shape and added the inner and outer glow layer style to them. Above their heads, it looks like a halo.
I'd like to make it seem like the halo's light is interacting with the women's bodies within the image. What I will do now is
Create a new layer
Set brush to 9%
Select Hot Magenta: ff009b (Foreground/Background)
Select Hot Turquoise: 00ccff (Foreground/Background)
Set layer blend mode to "Overlay"
Paint over highlights where you'd like color.
You may have to adjust your color for your image as every image us unique.
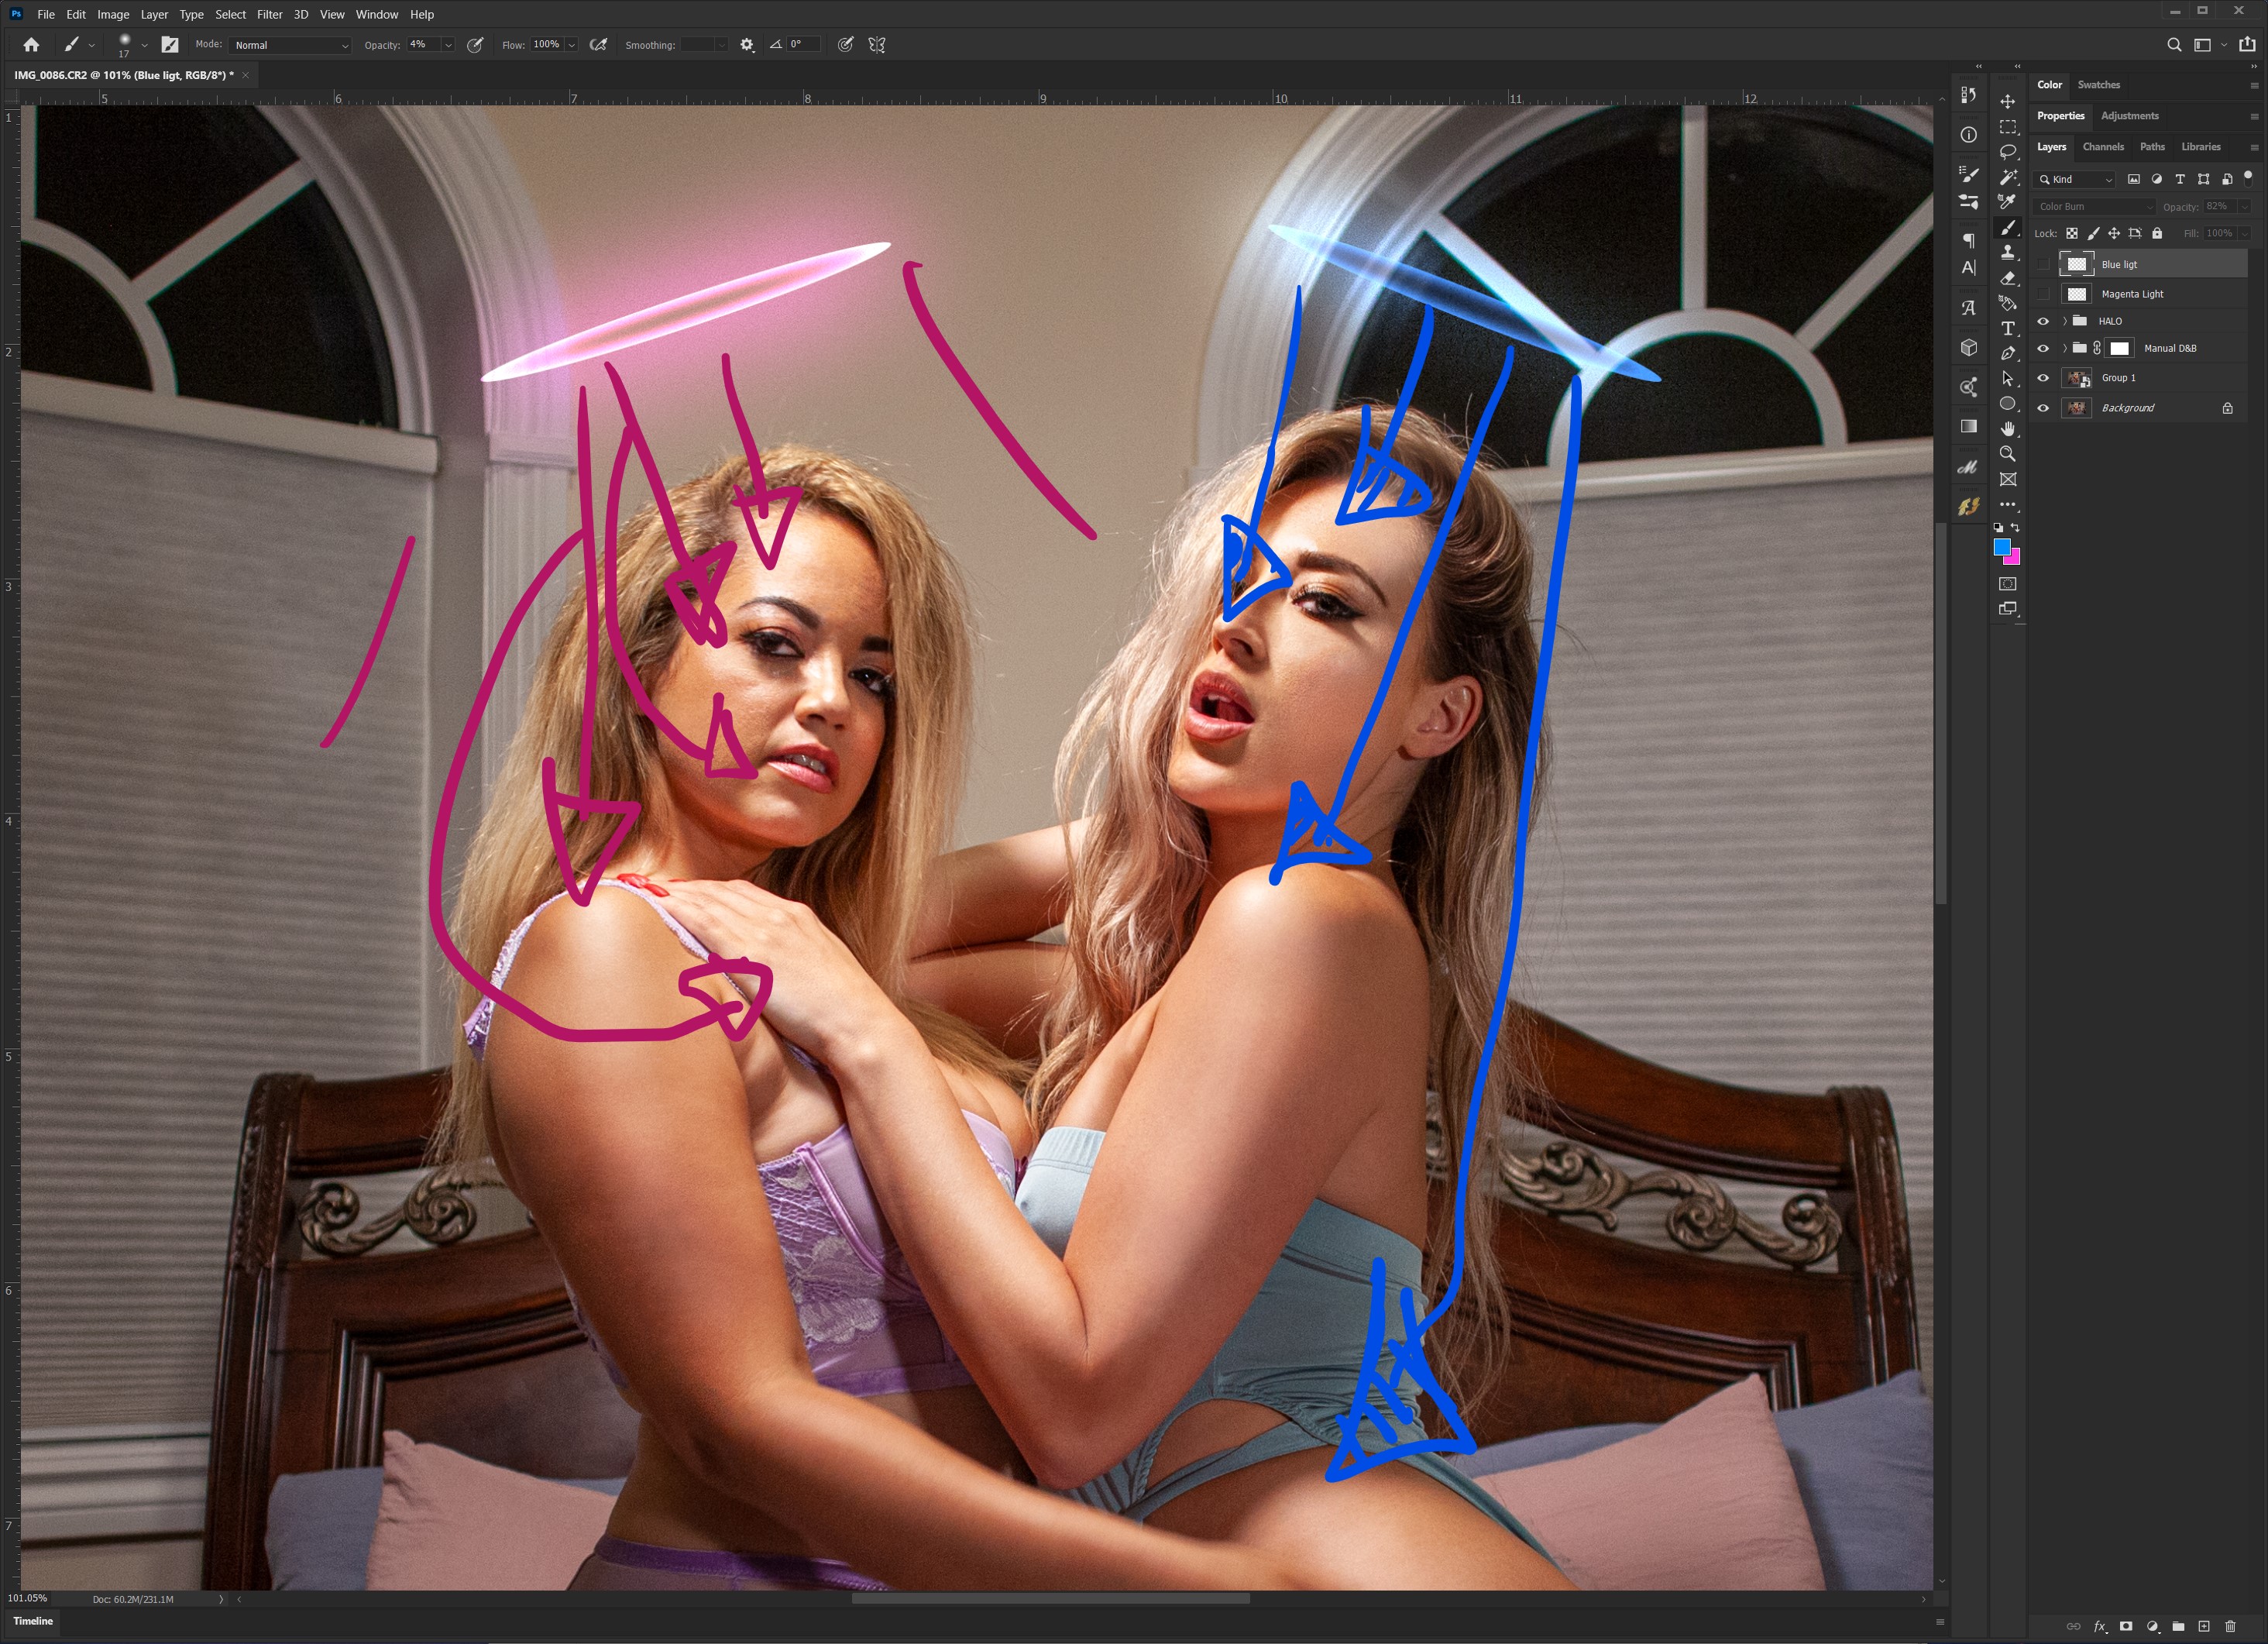
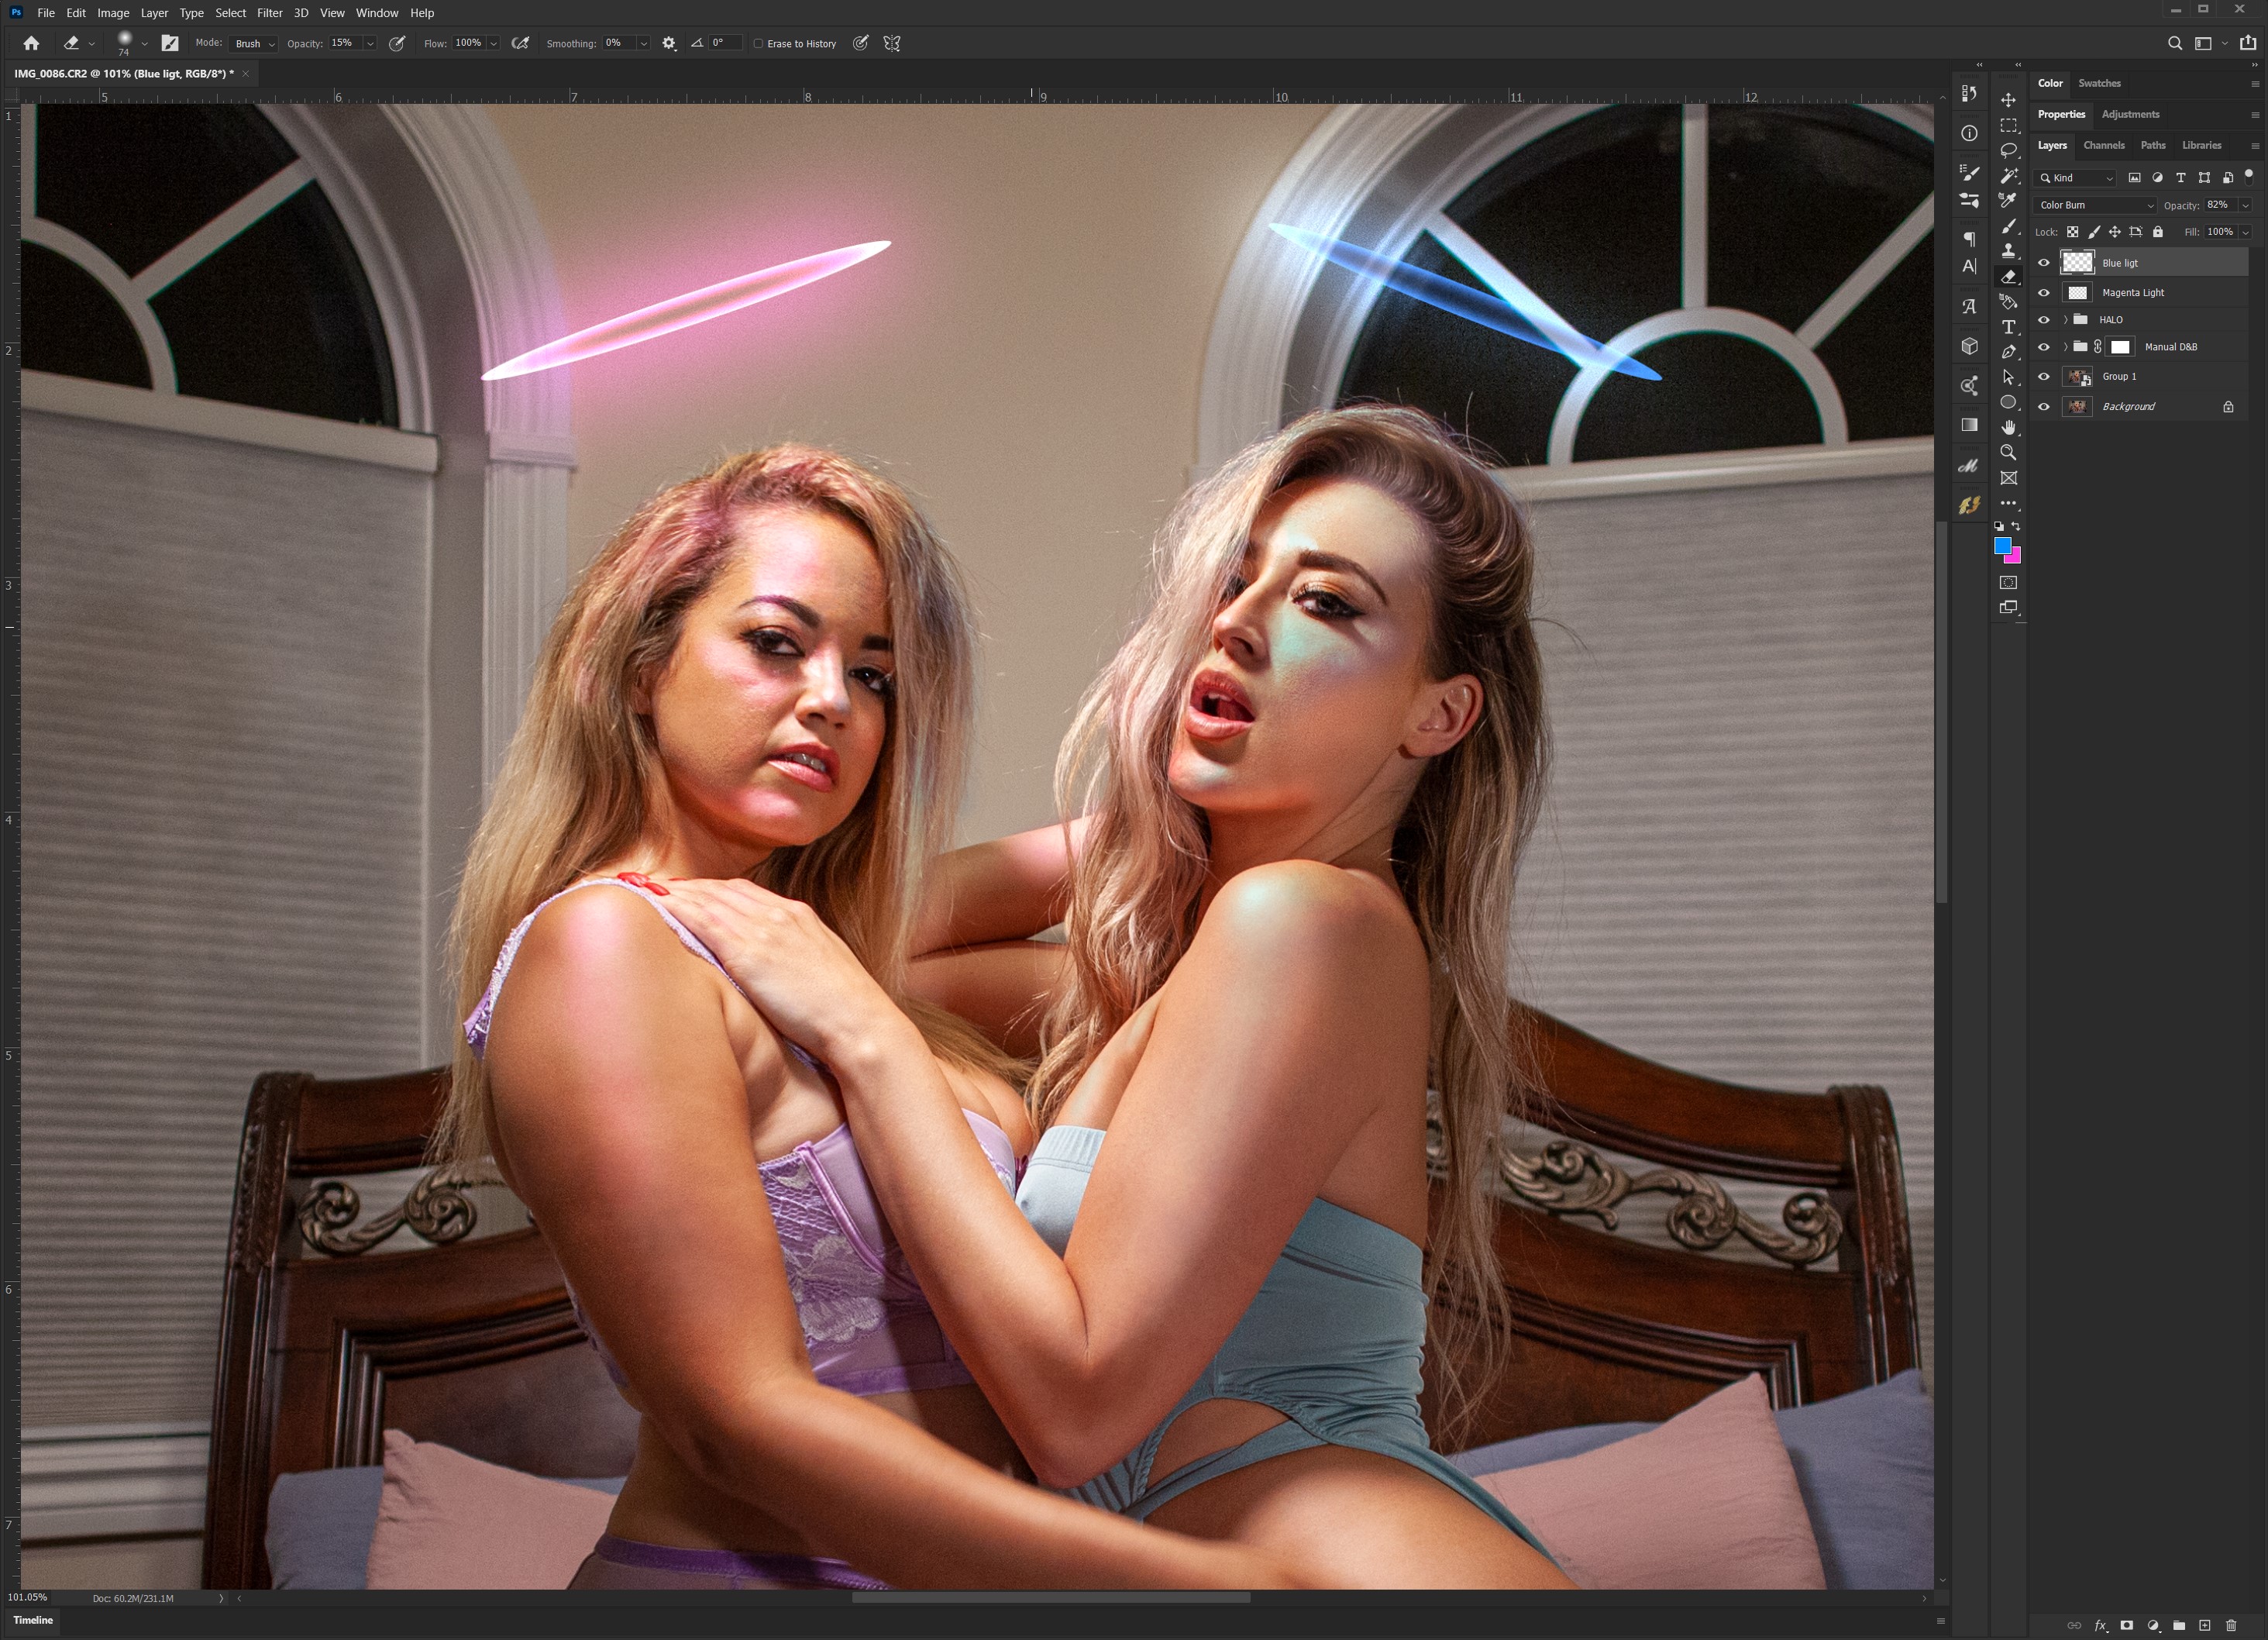
Below you can see I've added colored light to their faces and shoulders
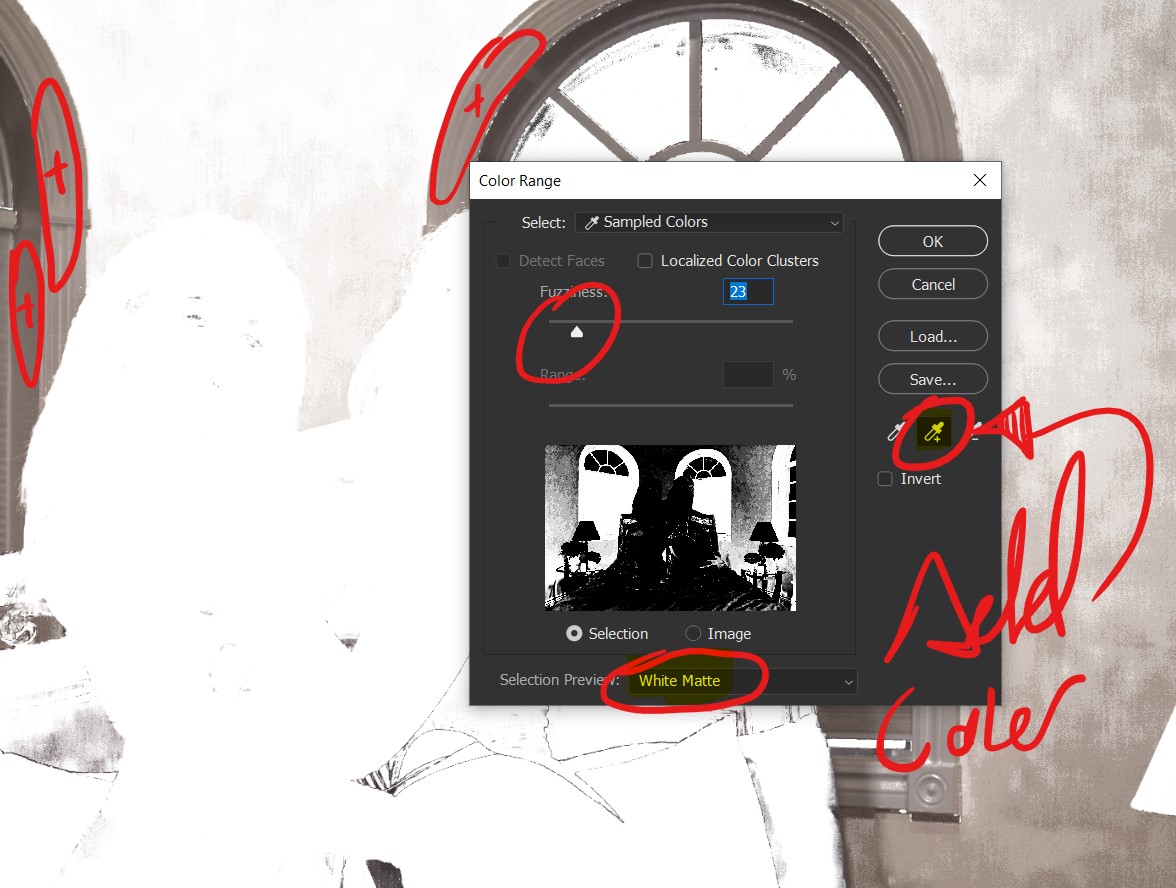
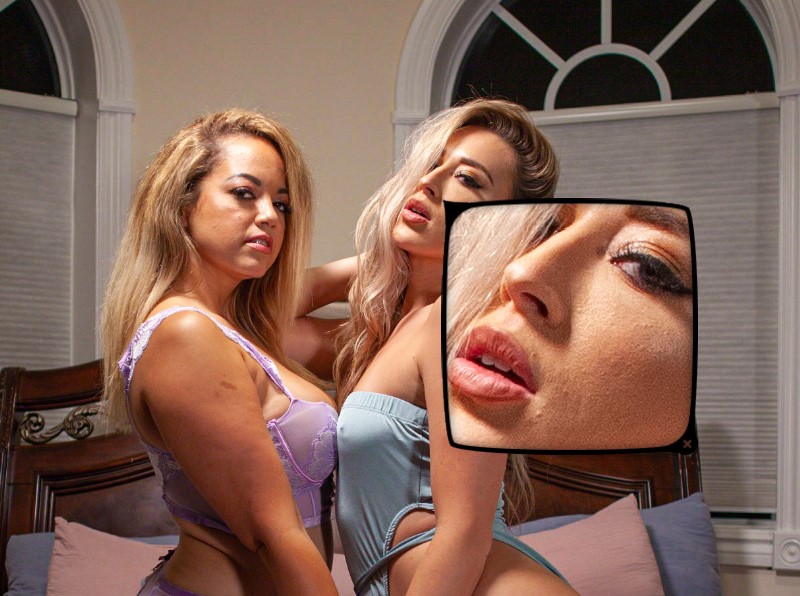
Next I'll use the color select tool to select any color close to white that is not on the models. In this case, I sampled color from the windows. It doesn't have to be fully white, it just has to be close.
Selecting a specific color.
Click Select
Color range...
A window will pop up. In the screenshot above, you'll see ovals with plus signs in them. I wrote this on screen so that you know what parts I've added to the range of color I've selected.
3. Click "Ok"
You'll see a selection or "Marching ants". Make sure your layer is highlighted. Paint in the areas you think should be lit.
After erasing the parts I don't want, this is the result.
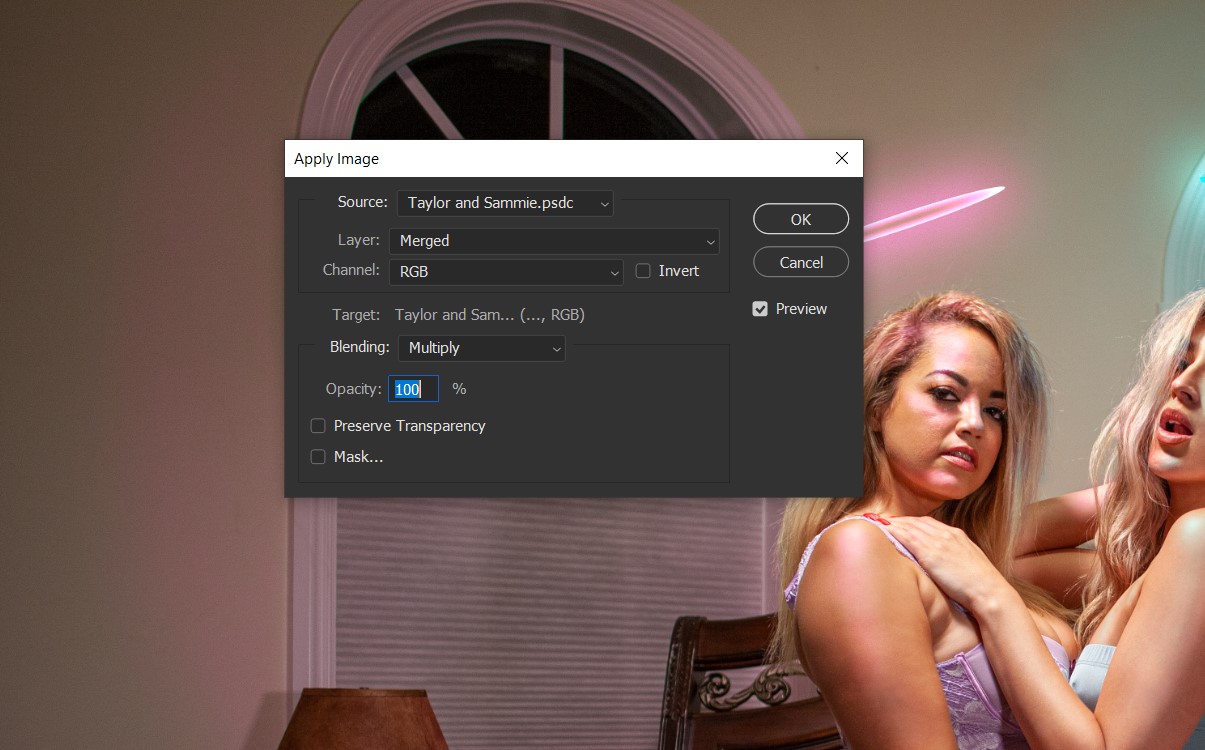
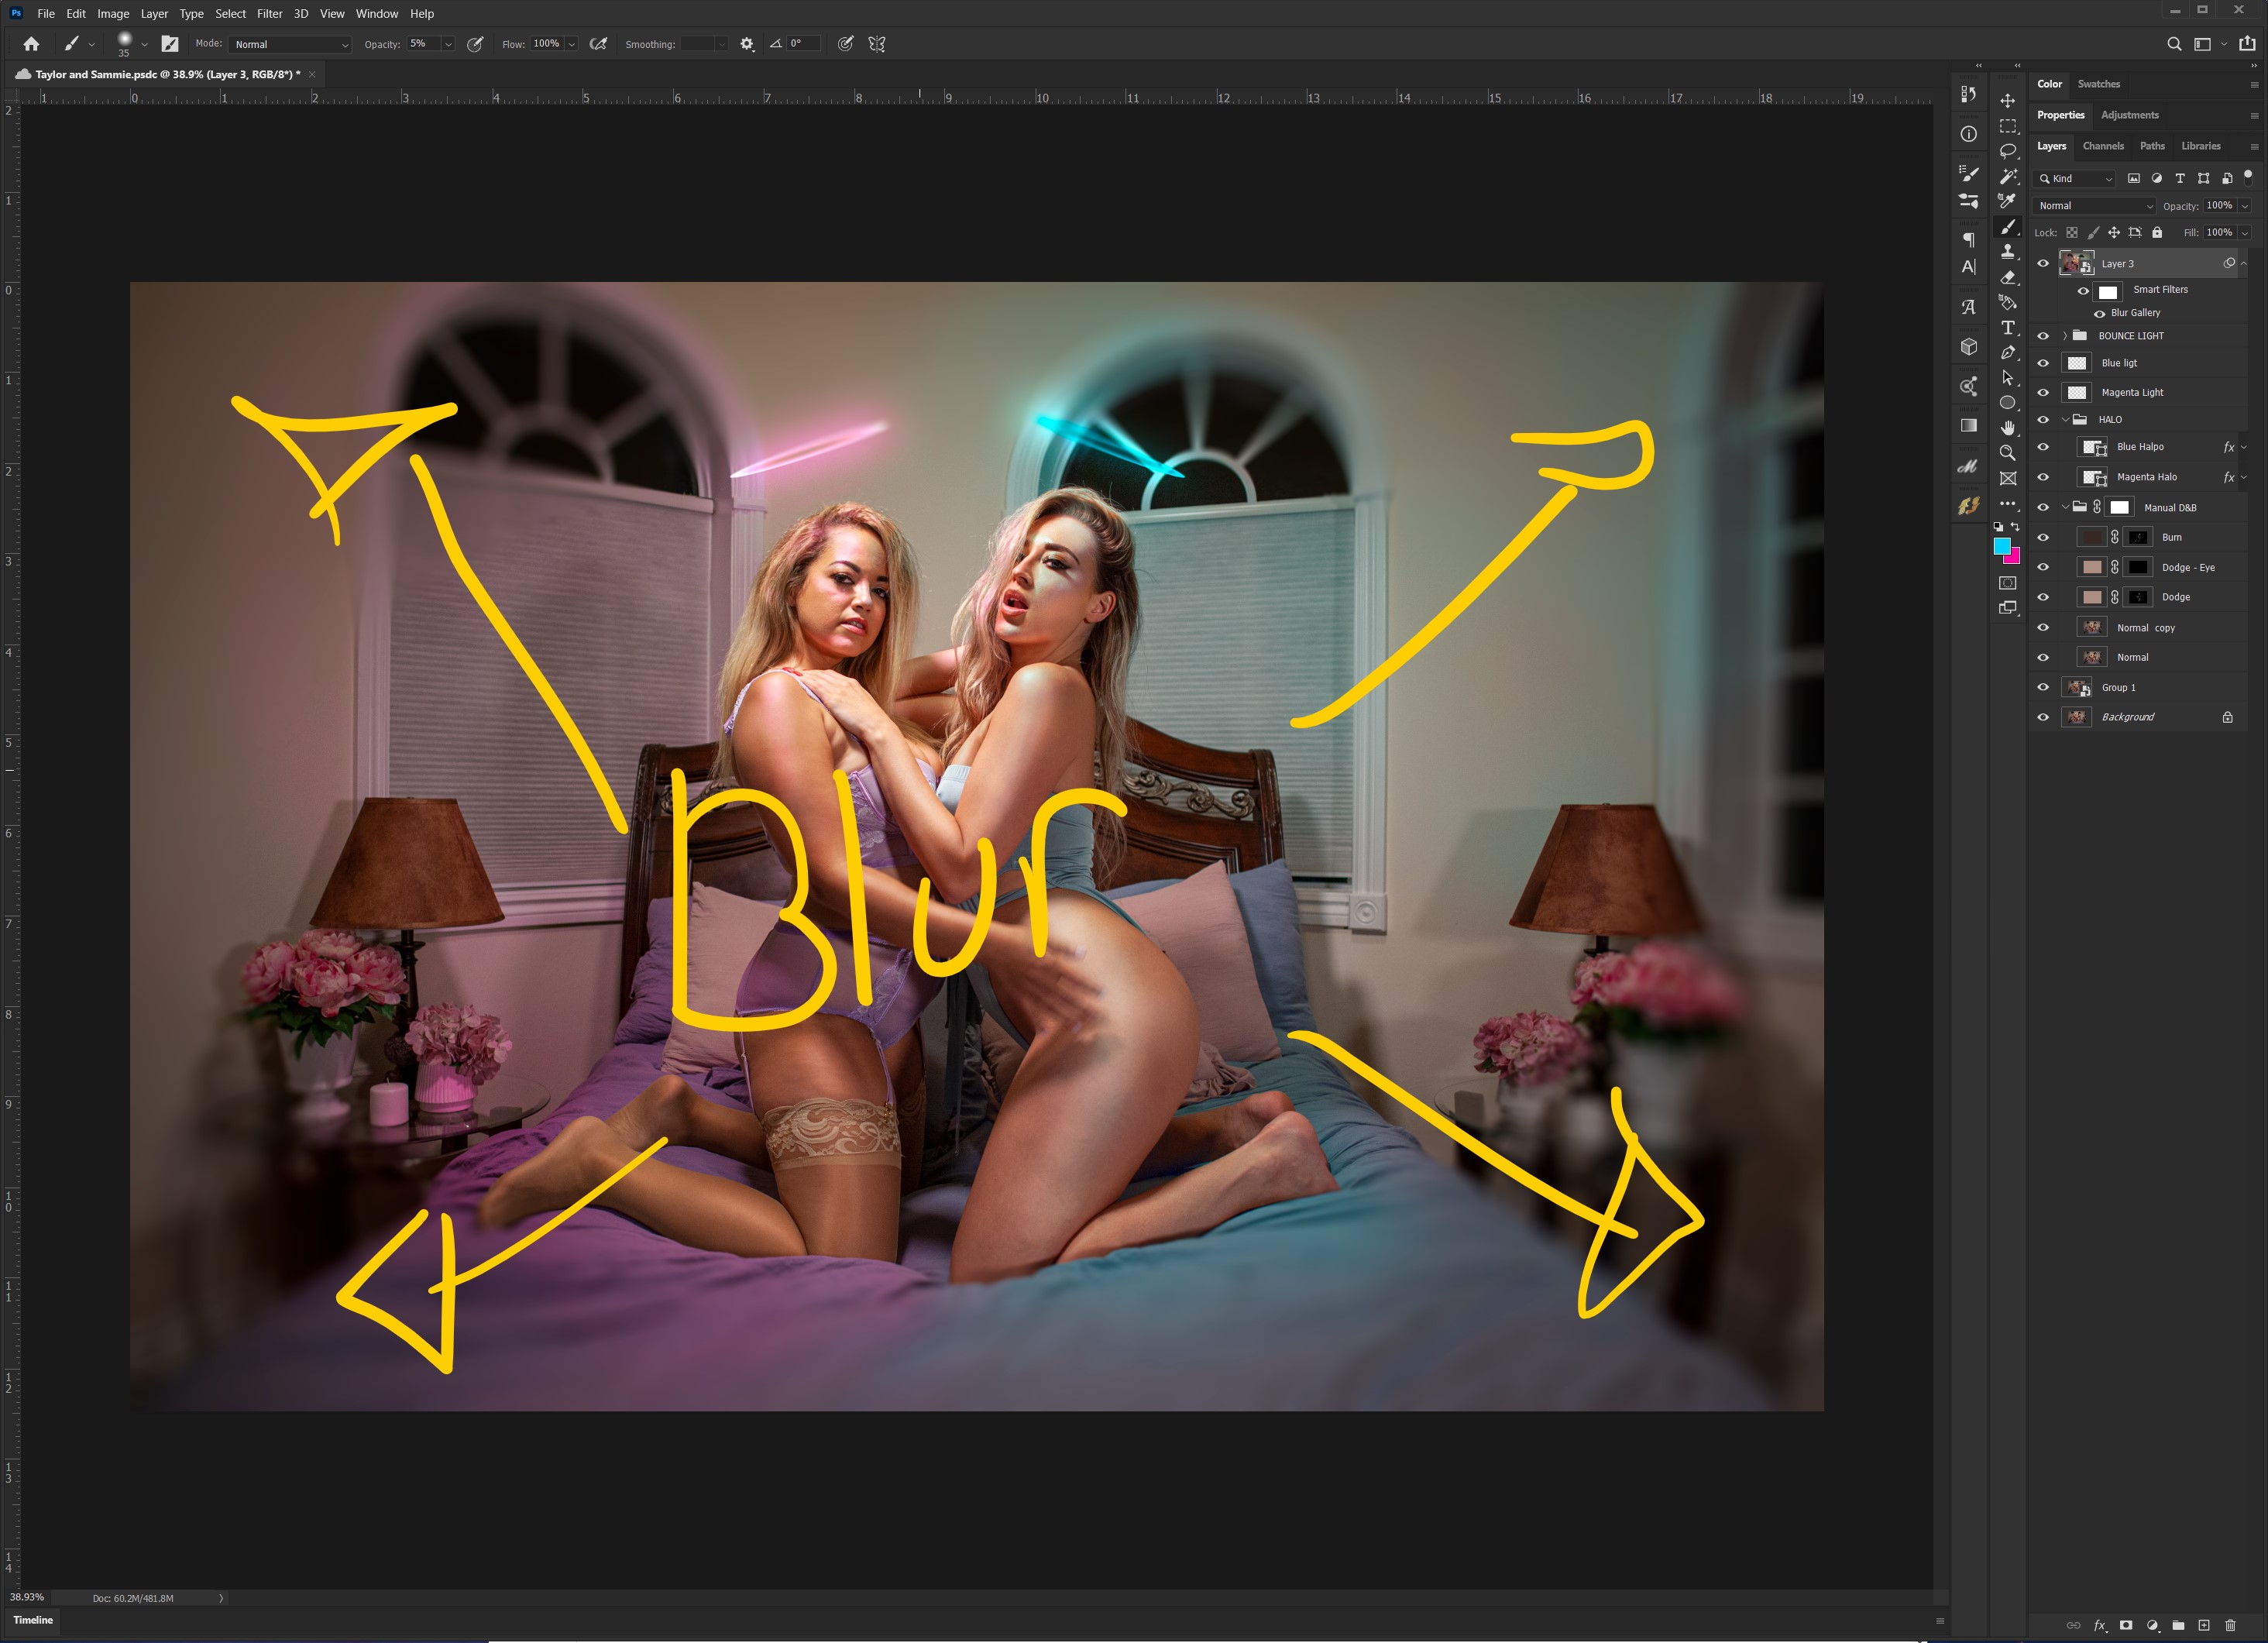
Now for some finishing touches. I like to use the focal blur to create a nice blur vignette to focus the viewer's eyes toward the center where our women are. The best way to do this is to
Create a new layer
Select > Apply Image > OK
Right click layer > Convert layer into Smart object
Filter > Blur Gallery > Iris Blur > (adjust the blur to your liking) > OK
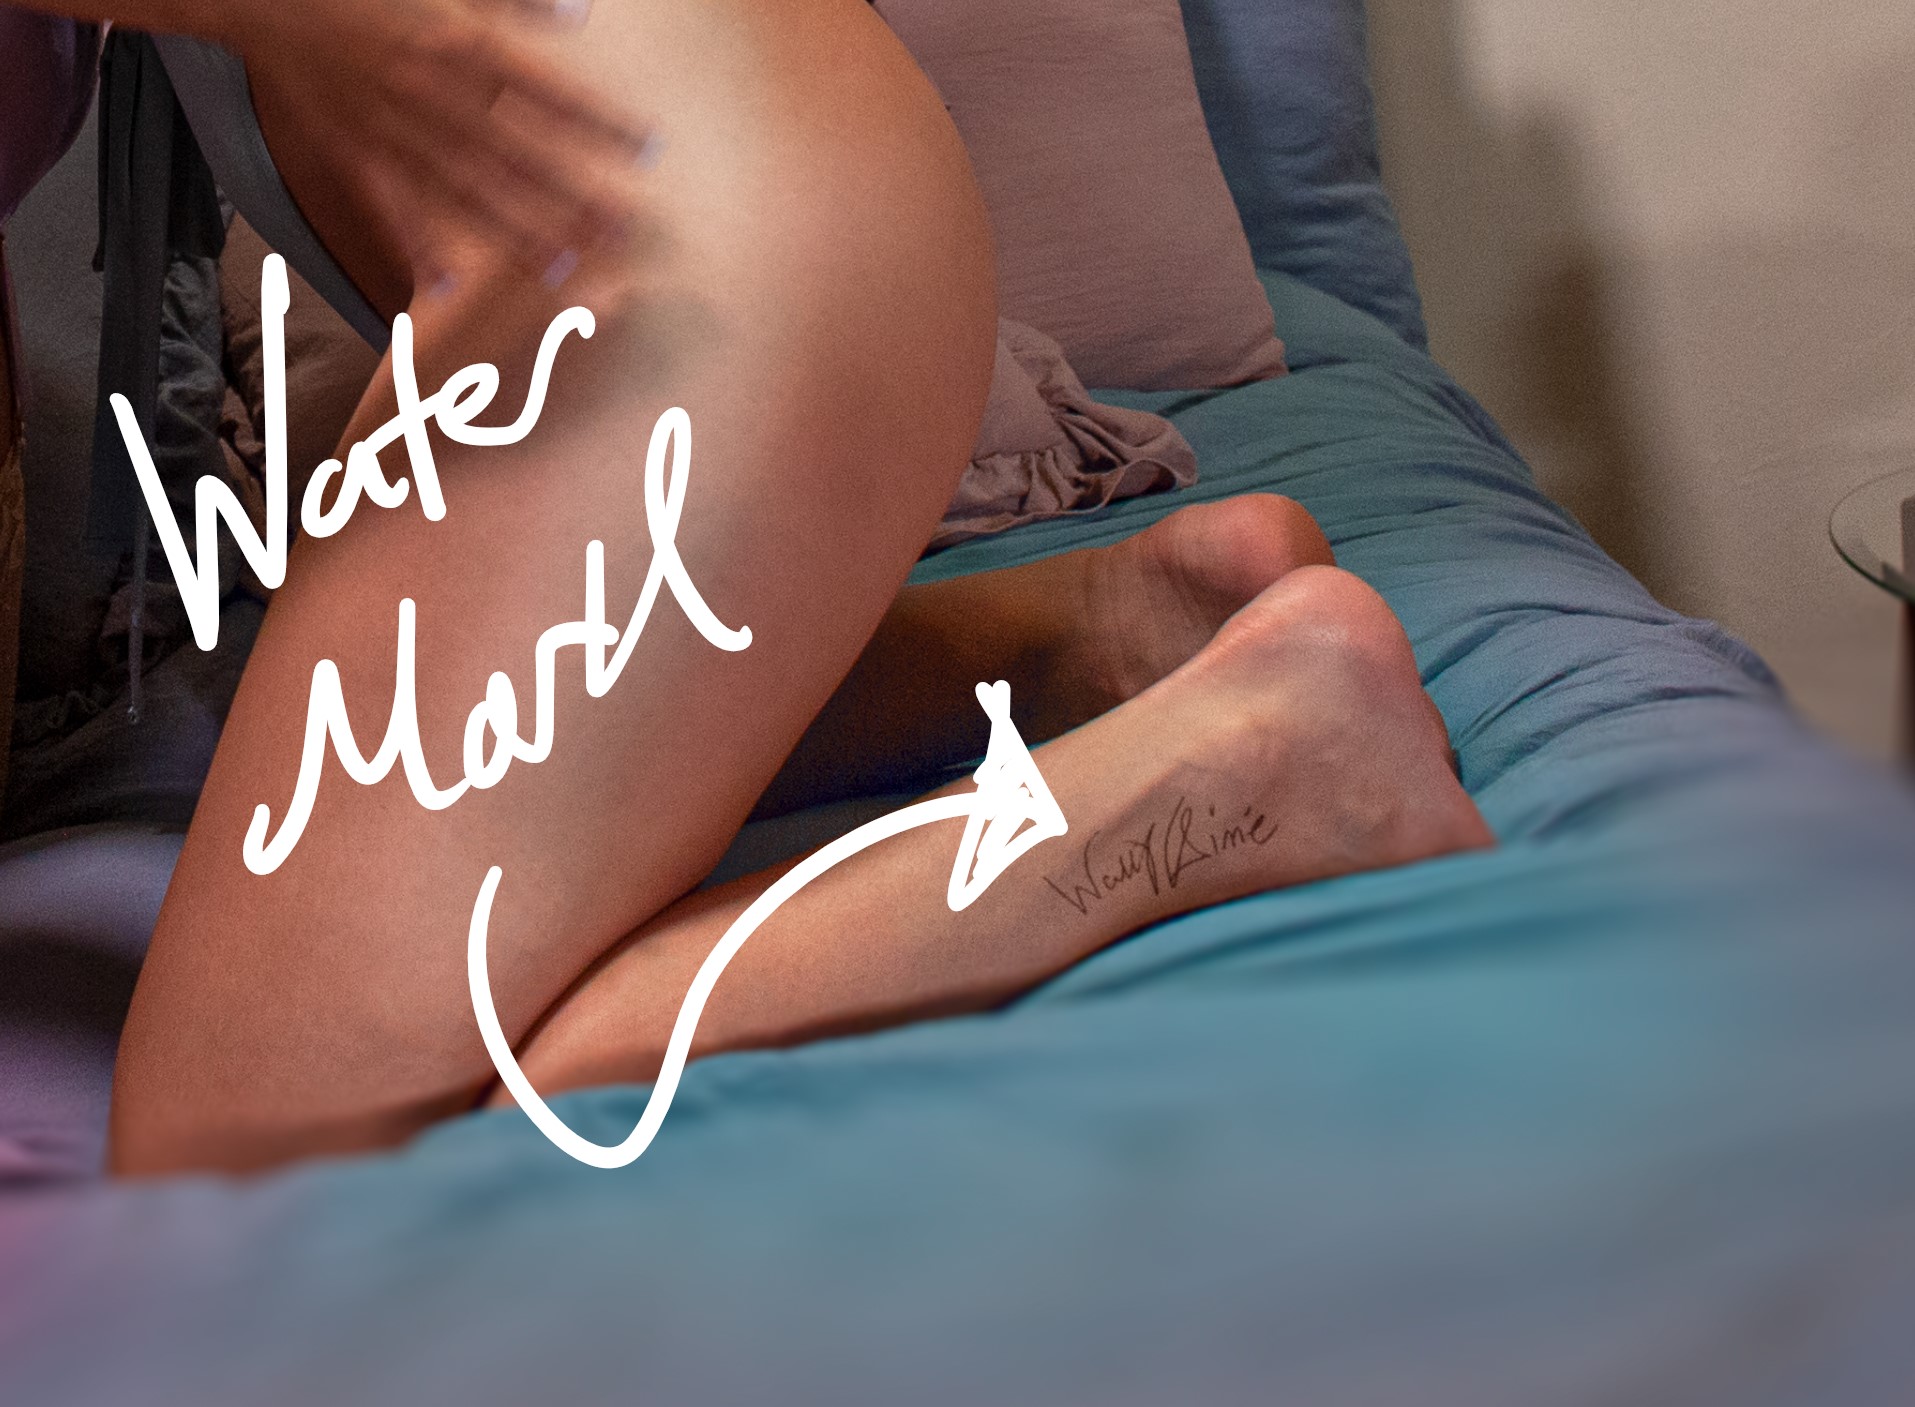
Never forget your water mark. Instead of slapping on a logo some place. I like to make my watermark a tattoo on my models.
Below is the final image.